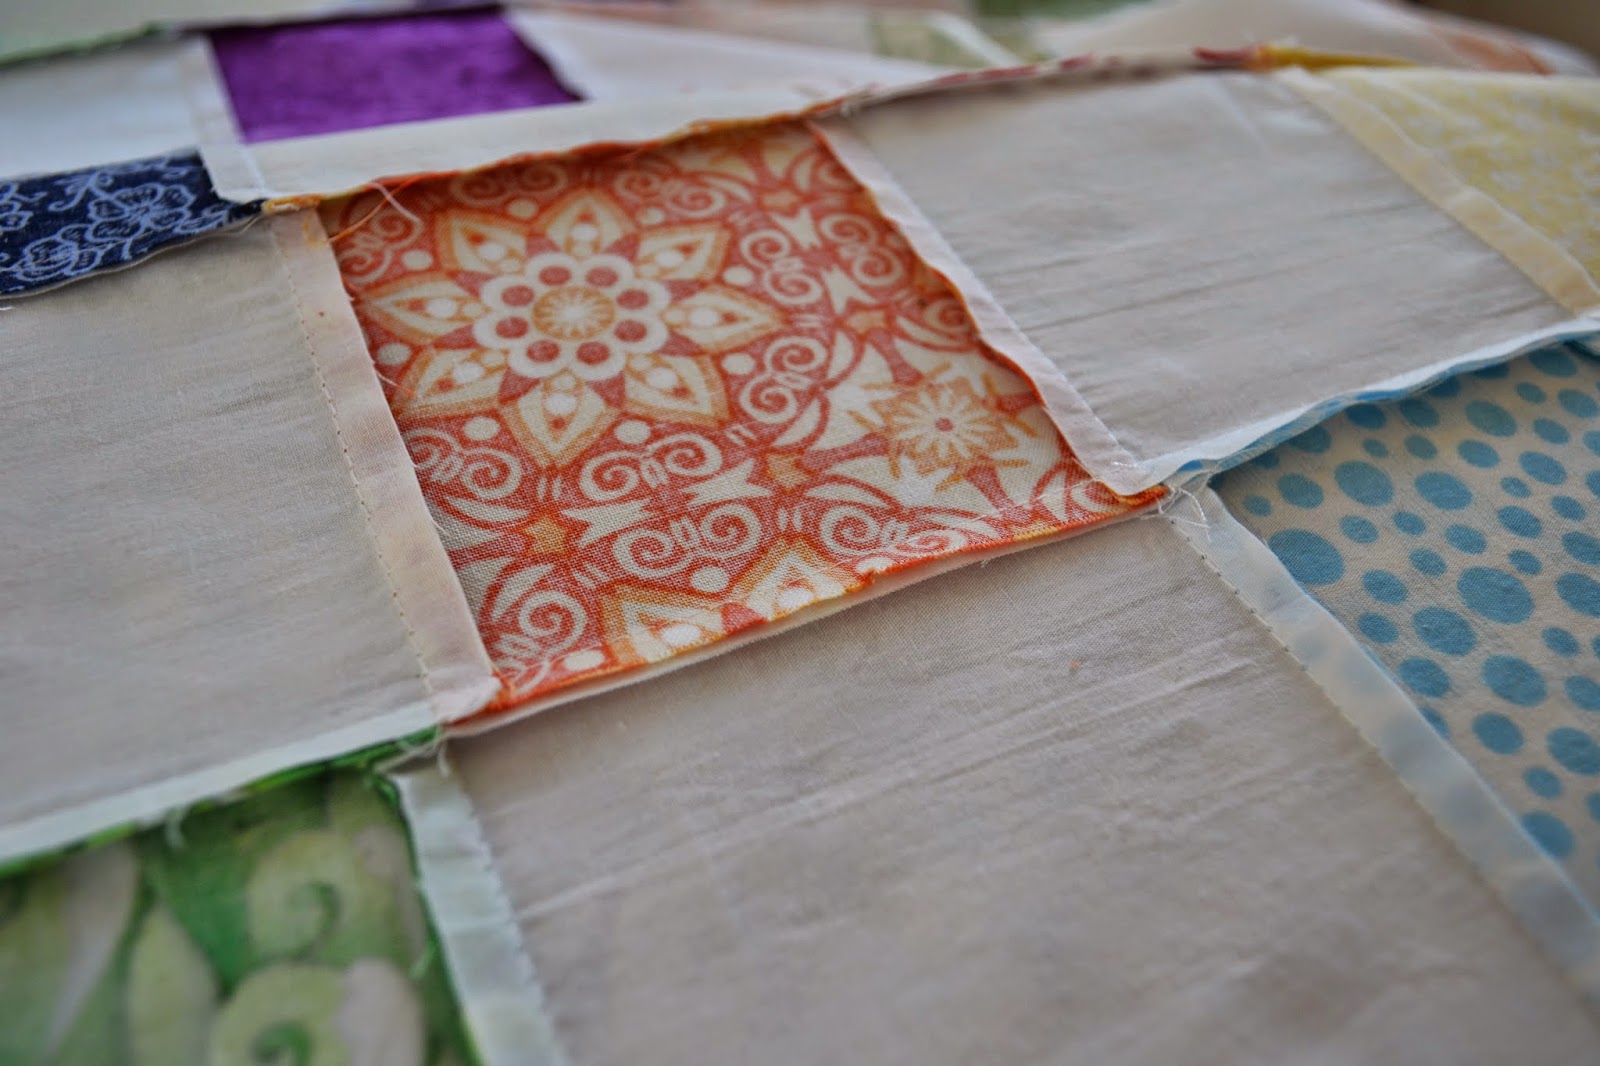
My next big project will be purple, green, black, and white.
The Weathervane quilt at Patch the Giraffe (scroll down) has been on my mind, but then I came across the Jewel Box/Buckeye Beauty pattern, and I thought that might work better with purple and green being the two main colors.
Someday I'll sketch out some possibilities for this one, but right now I'm in the middle of banging out a baby blanket for one of my kiddo's wonderful childcare providers, who's due in a few weeks. When I get a spare few minutes, I pick up my spinning:
because I like it and because finishing that hand quilted thing inspired me to pick up more utterly endless projects.
Happy crafting!
9.01.2014
8.22.2014
More boulders! More mountains!
It is done! Done, done, done!
I cannot believe it! I think that this just became my prized possession. For a crazy moment, I considered taking out an insurance policy on it, but then realized that an insurance policy would only give me money if I lost it, not the hours (and hours) of my life that I spent on it back.
I started this in a weeklong class on Hawaiian quilting. Hawaiian quilts are made from one piece of fabric appliqued onto a wholecloth background. The applique is cut paper-snowflake-style from folded fabric. The amount of time it took to applique this sucker down was substantial, and I remember working on it for hours and looking up and realizing that my eyes were not able to focus on the far wall of the room. Haha, whoops! Hopefully that wasn't a permanent effect.
When picking this back up, I had a moment of "gah, why on-point setting," but it quickly became "gah, why choose a design calling for on-point setting." This had to be on-point, and I didn't ruin what little farsightedness I had left to leave it unfinished.
It's been pretty rainy, so the pictures are a bit dark. The pic below shows the screaming pink/orange more accurately than the ones above.
So, to pick up hand quilting again, I watched part of a three-minute YouTube video and then just did it for hours and hours and hours and hours. The two tips I have for aspiring hand-quilters are as follows: 1) use the thimbled finger and your thumb to grip the needle as you pull it through the pile of stitches you've made, and 2) focus on the evenness of the length of the stitches on top, rather than how far apart they are, because the visible thread is more noticeable than the spaces (where the thread is in the back). Your spacing will get better as you go along, too.
The selvage of the pink/orange fabric was dated 2004, so I'm guessing that's the year that I started this bad boy. Ten years! The big whompin bed quilt I finished a few months ago was only started four years ago. There's one more quilting UFO left, this one started in 1998, and then that's it for long-buried projects. Luckily, my nascent spinning skills and tendency to spin ridiculously thin offer a couple projects that shouldn't be finished until around 2030 or so. Honestly, it's weirdly scary to contemplate being out of old projects - like they're only part of my identity if they're unfinished? I don't know. Didn't anticipate existential terror as a result of finishing this quilt up.
Aaaand on that note, happy crafting!
Linking up to crazymomquilts for Finish It Up Friday! Look for me there again in 3 decades!
I cannot believe it! I think that this just became my prized possession. For a crazy moment, I considered taking out an insurance policy on it, but then realized that an insurance policy would only give me money if I lost it, not the hours (and hours) of my life that I spent on it back.
I started this in a weeklong class on Hawaiian quilting. Hawaiian quilts are made from one piece of fabric appliqued onto a wholecloth background. The applique is cut paper-snowflake-style from folded fabric. The amount of time it took to applique this sucker down was substantial, and I remember working on it for hours and looking up and realizing that my eyes were not able to focus on the far wall of the room. Haha, whoops! Hopefully that wasn't a permanent effect.
When picking this back up, I had a moment of "gah, why on-point setting," but it quickly became "gah, why choose a design calling for on-point setting." This had to be on-point, and I didn't ruin what little farsightedness I had left to leave it unfinished.
It's been pretty rainy, so the pictures are a bit dark. The pic below shows the screaming pink/orange more accurately than the ones above.
So, to pick up hand quilting again, I watched part of a three-minute YouTube video and then just did it for hours and hours and hours and hours. The two tips I have for aspiring hand-quilters are as follows: 1) use the thimbled finger and your thumb to grip the needle as you pull it through the pile of stitches you've made, and 2) focus on the evenness of the length of the stitches on top, rather than how far apart they are, because the visible thread is more noticeable than the spaces (where the thread is in the back). Your spacing will get better as you go along, too.
The selvage of the pink/orange fabric was dated 2004, so I'm guessing that's the year that I started this bad boy. Ten years! The big whompin bed quilt I finished a few months ago was only started four years ago. There's one more quilting UFO left, this one started in 1998, and then that's it for long-buried projects. Luckily, my nascent spinning skills and tendency to spin ridiculously thin offer a couple projects that shouldn't be finished until around 2030 or so. Honestly, it's weirdly scary to contemplate being out of old projects - like they're only part of my identity if they're unfinished? I don't know. Didn't anticipate existential terror as a result of finishing this quilt up.
Aaaand on that note, happy crafting!
Linking up to crazymomquilts for Finish It Up Friday! Look for me there again in 3 decades!
7.19.2014
Plodding ever forward
Gone are the hours of tiny-baby naps and maternity leave. Summers around here are lean times, so I've committed to finishing a project that will require no more expenditures to complete, which I expect to happen sometime around 2017. Baby sometimes gives me time in the evenings, when this comes out.
Two corners are done and there are about 1.5 to go. When I can work on it for an hour or so, it seems to be going fast. And it probably is going fast, but it's so huge that even fast equals hours and hours and hours and hours and hours of work. As I stitch, I sit there and think about whether I will get my 10,000 hours of expertise all crammed into this one object. My hand stitching is getting a lot better, and it's kind of cool to have all my experience thus far all together.
For a while there, I was worried about whether the thread was going to last, because it occurred to me about 1/3rd of the way into this that it will be hard to replace.
Because, as you can see, it's made by a company that may not exist anymore and cost $0.90 originally. I probably swiped it from my mom's sewing basket about 17 years ago, and it was chewed by a dog since then. One complete corner seems to take about one height of the spool's worth of thread, so right now I'm guessing I won't run out.
There's a plain pair of socks in progress for working on while I'm on the phone at work. The first one is reaching the toe, so I need to take some time to decide exactly when to start it and it would be awkward if someone at work came into my office when I've got my sock and shoe off and am trying on a sock on the needles. Probably should bring that home for just a bit.
Happy crafting! If you don't hear from me for a while, assume I'm on hour 6,000 of hand quilting.
Two corners are done and there are about 1.5 to go. When I can work on it for an hour or so, it seems to be going fast. And it probably is going fast, but it's so huge that even fast equals hours and hours and hours and hours and hours of work. As I stitch, I sit there and think about whether I will get my 10,000 hours of expertise all crammed into this one object. My hand stitching is getting a lot better, and it's kind of cool to have all my experience thus far all together.
For a while there, I was worried about whether the thread was going to last, because it occurred to me about 1/3rd of the way into this that it will be hard to replace.
Because, as you can see, it's made by a company that may not exist anymore and cost $0.90 originally. I probably swiped it from my mom's sewing basket about 17 years ago, and it was chewed by a dog since then. One complete corner seems to take about one height of the spool's worth of thread, so right now I'm guessing I won't run out.
There's a plain pair of socks in progress for working on while I'm on the phone at work. The first one is reaching the toe, so I need to take some time to decide exactly when to start it and it would be awkward if someone at work came into my office when I've got my sock and shoe off and am trying on a sock on the needles. Probably should bring that home for just a bit.
Happy crafting! If you don't hear from me for a while, assume I'm on hour 6,000 of hand quilting.
5.26.2014
Quilters Gonna Hate
It seems that in every quilting project, I reach a nadir and simply hate how it looks.
This is different from the moment of doubt, or when you're trying out various options and go, ooh, no, or when you're finished and wonder what it would've looked like with another border. This is when you decide you're going to tell the blog that your quilt in progress/design wall was destroyed in a freak attack by your cat - wait, no, your neighbor's cat, yes, the neighbor's crazy cat who hates orange and who knew he was such a good climber? and you are so devastated, because it was going so well, you see, you are so devastated that you're just going to start over on something else.
My moment with this quilt - hopefully the only moment with this quilt - came when I'd finished laying out the third row here. Haaaate. Knowing the desire to clean off the design wall with fire might pass (yes, more orange is just what this needs!), I pressed on. It's once more acceptable to keep working on, although this picture's not doing it any favors.
Another, different kind of moment came when I realized I'd calculated the number of tumblers for the desired width of the quilt as if the tumblers were square, but alas, they are not. Tumblers, how do they work? So now I get to decide if there should be 14 more to cut, leaving the quilt asymmetrical, or if there are 28 more to cut, leaving me seriously grumpy.
Happy crafting!
5.19.2014
Orange tumbler, WIP
I'm making my daughter an orange quilt for when she moves out of her crib and into a twin bed. It will probably fulfill the role of something to look at on the design wall for ages, because progress on quilting goals is going to stall with my return to work this week.
This is an order from Hawthorne Threads, plus some quarter yards from some LQS shopping done on our trip.
Since she could pick out markers and point to colors, orange has been her favorite. I'm not sure how stable these preferences are, because last week she said her favorite color was pink black purple green blue yellow. When we went to get her some shoes, there wasn't a pair that she didn't like, from infant boys' sneakers to adult women's slippers.
This was the initial fabric pull - it quickly became obvious that bed-sized quilts take a lot more fabric than I'm used to needing. It also would appear that the market right now is tending toward brownish oranges, rather than pinkish or yellowish.
In one fabric store, I showed her two orange fabrics and asked her which she liked better. She pointed to a lime green on the shelf. "No, of just these two." Points at lime green.
So I picked one of the orange ones. There will be no lime green in this quilt. It feels weird, because I'm making this for her, but am choosing the fabrics and pattern I like, or at least think contribute to a good design overall. I'm incredibly specific - or picky, depending on how frustrated with me you are at the moment - and don't like what I don't like.
One thing I don't like is a mushy muddled mishmash of colors and pattern. I like contrast. At first I considered doing white around each tumbler to separate them enough, but now I'm thinking there may be enough variation in the values that white won't be necessary.
One more fabric is on its way (crabs!) and then it'll be time to start working on the layout. Big as my lovely design wall is, it's not twin-sized, so I'll probably put together two horizontal rows at a time, then decide what order to put those in. The back will be Spot Check (seen above on the handlebar of the stroller), perhaps with some mini tumblers.
Happy crafting!
| In the bottom left, you can see the tumbler template cut from a Cheerios box! |
This is an order from Hawthorne Threads, plus some quarter yards from some LQS shopping done on our trip.
Since she could pick out markers and point to colors, orange has been her favorite. I'm not sure how stable these preferences are, because last week she said her favorite color was pink black purple green blue yellow. When we went to get her some shoes, there wasn't a pair that she didn't like, from infant boys' sneakers to adult women's slippers.
This was the initial fabric pull - it quickly became obvious that bed-sized quilts take a lot more fabric than I'm used to needing. It also would appear that the market right now is tending toward brownish oranges, rather than pinkish or yellowish.
In one fabric store, I showed her two orange fabrics and asked her which she liked better. She pointed to a lime green on the shelf. "No, of just these two." Points at lime green.
So I picked one of the orange ones. There will be no lime green in this quilt. It feels weird, because I'm making this for her, but am choosing the fabrics and pattern I like, or at least think contribute to a good design overall. I'm incredibly specific - or picky, depending on how frustrated with me you are at the moment - and don't like what I don't like.
One thing I don't like is a mushy muddled mishmash of colors and pattern. I like contrast. At first I considered doing white around each tumbler to separate them enough, but now I'm thinking there may be enough variation in the values that white won't be necessary.
One more fabric is on its way (crabs!) and then it'll be time to start working on the layout. Big as my lovely design wall is, it's not twin-sized, so I'll probably put together two horizontal rows at a time, then decide what order to put those in. The back will be Spot Check (seen above on the handlebar of the stroller), perhaps with some mini tumblers.
Happy crafting!
5.18.2014
Blogger's Quilt Festival: I Like THAT One!
Even though I haven't delved into more complicated piecing or quilting again (yet), I'm entering the Blogger's Quilt Festival in the Mini Quilt category because I think it's awesome that Amy organizes this twice a year and I love seeing what everyone else is working on.
This little quilt is important to me because it's a great example of how lots of little bits - of both time and fabric - can add up to something really nice.
It was the first quilt I hung up upstairs in our new house, and it inspired me to dig out a couple of finished ones to hang, and keep making new ones as well.
It's named after my two-year-old daughter's reaction to seeing it all finished - though, to be fair, I haven't seen her meet a scrap of fabric she didn't like.
So, check out the Festival, vote and enjoy the eye candy, and happy crafting!
This little quilt is important to me because it's a great example of how lots of little bits - of both time and fabric - can add up to something really nice.
It was the first quilt I hung up upstairs in our new house, and it inspired me to dig out a couple of finished ones to hang, and keep making new ones as well.
It's named after my two-year-old daughter's reaction to seeing it all finished - though, to be fair, I haven't seen her meet a scrap of fabric she didn't like.
So, check out the Festival, vote and enjoy the eye candy, and happy crafting!
5.16.2014
Birdie Bag & Socks
Before our Long Car Trip (of Doom) (not really), I made a little drawstring bag for the Toddler (of Doom) (really), hoping that it would keep her entertained for 3 minutes.
I got the birdie fabric recently, as well as the white-with-purple-flowers liner fabric. The birdies weren't destined for a project, and the purple liner fabric is for a wallhanging I'm planning but haven't gotten around to, other than the designing.
Daughter picked out the purple squares fabric (by which I mean she picked it up at JoAnn Fabrics and didn't want to put it down), and the drawstring fabric was from my Mom's old stash - it didn't want to hold a crease, so I'm wondering if it's not 100% cotton.
Daughter loves pulling the drawstrings closed but isn't strong enough to open the bag back up, so there was a lot of, "Will you open this, please?" That counts as keeping us busy.
Tutorial here: In Color Order. I shaved half an inch off of the finished measurements because my fat quarter of the purple stuff was pretty skinny, in fact, and I didn't realize that I didn't need to sew a bottom seam and could have just used one big piece, because my Main Exterior fabric wasn't directional. (Doh.)
During the Long Car Trip, I also managed to finish two pairs of socks that had been over halfway done for a while. Above: Escalator Socks in Fleece Artist Trail Socks, colorway November Sky (I think. Their colorways are a bit... hit or miss? Not sure which phrase I'm looking for. There's more play than you might expect.).
Below are basic ribbed socks in Schachenmayr nomotta Regia Bamboo Color, a yarn I'm pretty sure is discontinued. It's a good yarn for summer socks. I started these before last summer so that they'd be ready for last summer, but instead they're ready for this summer. Good enough!
Linking up with Finish It Up Friday at Crazy Mom Quilts.
Happy crafting!
I got the birdie fabric recently, as well as the white-with-purple-flowers liner fabric. The birdies weren't destined for a project, and the purple liner fabric is for a wallhanging I'm planning but haven't gotten around to, other than the designing.
Daughter picked out the purple squares fabric (by which I mean she picked it up at JoAnn Fabrics and didn't want to put it down), and the drawstring fabric was from my Mom's old stash - it didn't want to hold a crease, so I'm wondering if it's not 100% cotton.
Daughter loves pulling the drawstrings closed but isn't strong enough to open the bag back up, so there was a lot of, "Will you open this, please?" That counts as keeping us busy.
Tutorial here: In Color Order. I shaved half an inch off of the finished measurements because my fat quarter of the purple stuff was pretty skinny, in fact, and I didn't realize that I didn't need to sew a bottom seam and could have just used one big piece, because my Main Exterior fabric wasn't directional. (Doh.)
During the Long Car Trip, I also managed to finish two pairs of socks that had been over halfway done for a while. Above: Escalator Socks in Fleece Artist Trail Socks, colorway November Sky (I think. Their colorways are a bit... hit or miss? Not sure which phrase I'm looking for. There's more play than you might expect.).
Below are basic ribbed socks in Schachenmayr nomotta Regia Bamboo Color, a yarn I'm pretty sure is discontinued. It's a good yarn for summer socks. I started these before last summer so that they'd be ready for last summer, but instead they're ready for this summer. Good enough!
Linking up with Finish It Up Friday at Crazy Mom Quilts.
Happy crafting!
5.02.2014
Finished: Mail-Order Gorilla
Here's another post for Finish it Up Friday over at crazy mom quilts with the actual details of the Mail-Order Gorilla quilt. (More about the process here.)
Size: 88" x 94" before washing
Design: basic patchwork, planned but random-looking color placement
Batting: Hobbs 100% cotton
Binding Kona Teal
Thread: C&C white poly for piecing, 100% cotton for quilting
Quilting: diagonal grid through all squares
It's all washed and on my bed, with the dog's blanket over the bottom half because she likes to scratch up her bedding.
Next up is an orange tumbler quilt for my daughter's bed - cutting started this morning, although I haven't decided details of the final design yet.
Thanks for visiting, and happy crafting!
Size: 88" x 94" before washing
Design: basic patchwork, planned but random-looking color placement
Batting: Hobbs 100% cotton
Binding Kona Teal
Thread: C&C white poly for piecing, 100% cotton for quilting
Quilting: diagonal grid through all squares
It's all washed and on my bed, with the dog's blanket over the bottom half because she likes to scratch up her bedding.
Next up is an orange tumbler quilt for my daughter's bed - cutting started this morning, although I haven't decided details of the final design yet.
Thanks for visiting, and happy crafting!
4.29.2014
Dudes.
It's finished.
Designed in 2010, pieced in 2011, finished in 2014. The top is a simple square patchwork with mostly stashed JoAnn prints, plus some quilt shop stuff, some fabric I dyed in a class, and white muslin. Plus some home dec weight. (Whoops!)
The backing is mostly Kona Natural, which had originally been intended for the plain squares on the front but didn't look good with a lot of the white-based fabrics. I might have been able to squeak by just piecing two lengths of that together, but it would've been close. So I pieced a bunch of prints from the top for the middle strip. (Then realized I'd snuck in some of my favorite green fabric, which was actually nowhere to be found in the top.)
Hand sewing the binding took FOREVER. It's a part that I enjoy, but holy cow. Bound in Kona Teal (I think, it's been awhile). The teal also matches nothing in the top.
I designed this top in Excel, deciding individually on the placement of each color. I was working a nice but boring temp job as a receptionist and put colors in squares between phone calls.
I'll wash it this afternoon and hope to sleep under it tonight. I'm a bit worried about the hand-dyed fabrics bleeding, so there will probably be a box of color catchers in the wash as well.
And now, on to the next (much, much smaller) project!
Designed in 2010, pieced in 2011, finished in 2014. The top is a simple square patchwork with mostly stashed JoAnn prints, plus some quilt shop stuff, some fabric I dyed in a class, and white muslin. Plus some home dec weight. (Whoops!)
| Backing! |
The backing is mostly Kona Natural, which had originally been intended for the plain squares on the front but didn't look good with a lot of the white-based fabrics. I might have been able to squeak by just piecing two lengths of that together, but it would've been close. So I pieced a bunch of prints from the top for the middle strip. (Then realized I'd snuck in some of my favorite green fabric, which was actually nowhere to be found in the top.)
| Binding! |
Hand sewing the binding took FOREVER. It's a part that I enjoy, but holy cow. Bound in Kona Teal (I think, it's been awhile). The teal also matches nothing in the top.
| Dramatic tree shadows! |
I designed this top in Excel, deciding individually on the placement of each color. I was working a nice but boring temp job as a receptionist and put colors in squares between phone calls.
I'll wash it this afternoon and hope to sleep under it tonight. I'm a bit worried about the hand-dyed fabrics bleeding, so there will probably be a box of color catchers in the wash as well.
And now, on to the next (much, much smaller) project!
4.23.2014
On the home stretch...
Machine-finishing the binding would have been perfectly reasonable.
But really, reasonableness isn't always the top criterion around here.
4.21.2014
The very longest pass
I've been continuing to grab moments here and there for quilting. A few nights ago, I was quilting in the semi-dark in the hopes that the baby would fall asleep in the swing.
It didn't work, but the backlighting from my machine was pretty.
Last night, I finished the last rows of quilting I'd planned and rejoiced and admired. Then I realized that these quilting lines are officially too far apart for the batting. I decided to "think about" adding more - doubling the existing quilting, actually - by putting diagonal lines through the color blocks, too. I knew I'd decide to do it, just needed some time to accept that I was only half-finished.
This morning, I did all of the lines in one direction. I also ironed the yardage that will be binding and got to worrying about whether there will be enough of it.
Stuffing this sucker through the machine hasn't been as bad as I'd expected. It's definitely difficult when I'm in the middle of the longest passes and a whole corner of the quilt is wedged in the throat, but there's still enough room to get my right hand under the bulk to hold onto the part being worked. I go one square at a time and have gotten my machine going full speed for probably the first time ever. Feels good.
Happy crafting!
It didn't work, but the backlighting from my machine was pretty.
Last night, I finished the last rows of quilting I'd planned and rejoiced and admired. Then I realized that these quilting lines are officially too far apart for the batting. I decided to "think about" adding more - doubling the existing quilting, actually - by putting diagonal lines through the color blocks, too. I knew I'd decide to do it, just needed some time to accept that I was only half-finished.
This morning, I did all of the lines in one direction. I also ironed the yardage that will be binding and got to worrying about whether there will be enough of it.
Stuffing this sucker through the machine hasn't been as bad as I'd expected. It's definitely difficult when I'm in the middle of the longest passes and a whole corner of the quilt is wedged in the throat, but there's still enough room to get my right hand under the bulk to hold onto the part being worked. I go one square at a time and have gotten my machine going full speed for probably the first time ever. Feels good.
Happy crafting!
4.16.2014
I prefer "meticulous"
Today's morning naptime found me ironing the top of the gorilla quilt. In little cracks here and there over the past few days, I managed to piece and press the back.
I also used thread snips to clean up the block edges and a piece of masking tape to pull off any stray dog hair. It was taking forever, so I flipped it over to check and see if stray threads were showing through the front. They weren't. Did I stop clipping?
I did not.
So the dining room is in a, shall we say, unreasonable state for a family of four plus dog. There's batting on top of the back now, which is also taped down already. But the batting is not flat, it needs to be smoothed out, which is proving difficult. I may move it and cut down 3 sides instead of two - there's not enough extra along the edge for any size quilt I'll be making anytime soon anyway.
For that exercise, I should find my Decent scissors (as opposed to the Good scissors and the Crappy scissors).
Okay, turns out I'm liveblogging! Or whatever it's called when you write updates but don't publish them all until the end. Baby Overlord seemed sleepy and slept for a bit longer while I Tasmanian Deviled around the dining room.
So, I got smarter and moved the whole piece of batting to the other side and cut along two sides as originally planned. And then I got very smart and figured out which was the long edge of the top before laying it out wrong. Folded it in half, put the center point at the center of the strip of color in the backing, and smoothed out the top from there.
THERE ARE SAFETY PINS IN IT. I'm not done basting, but it's started and I'm cautiously optimistic that I can get the basting done and the thing off the floor before family starts getting home. Bub's out again, so it's back to basting.
Happy crafting!
I also used thread snips to clean up the block edges and a piece of masking tape to pull off any stray dog hair. It was taking forever, so I flipped it over to check and see if stray threads were showing through the front. They weren't. Did I stop clipping?
I did not.
So the dining room is in a, shall we say, unreasonable state for a family of four plus dog. There's batting on top of the back now, which is also taped down already. But the batting is not flat, it needs to be smoothed out, which is proving difficult. I may move it and cut down 3 sides instead of two - there's not enough extra along the edge for any size quilt I'll be making anytime soon anyway.
For that exercise, I should find my Decent scissors (as opposed to the Good scissors and the Crappy scissors).
Okay, turns out I'm liveblogging! Or whatever it's called when you write updates but don't publish them all until the end. Baby Overlord seemed sleepy and slept for a bit longer while I Tasmanian Deviled around the dining room.
So, I got smarter and moved the whole piece of batting to the other side and cut along two sides as originally planned. And then I got very smart and figured out which was the long edge of the top before laying it out wrong. Folded it in half, put the center point at the center of the strip of color in the backing, and smoothed out the top from there.
THERE ARE SAFETY PINS IN IT. I'm not done basting, but it's started and I'm cautiously optimistic that I can get the basting done and the thing off the floor before family starts getting home. Bub's out again, so it's back to basting.
Happy crafting!
4.14.2014
Nap!! Ahhhh!
Here's how my design wall looked this morning. Very sad. I'm tempted to start a project I'll have no hope of finishing for four years, just to have something to look at.
And then the baby fell asleep, and I swung into crazy, hopeful action. As I'd mentioned, I have no handy UFOs that I could pull out and work on in a staid, leisurely way. No pretty stack of blocks or thing all basted and ready to quilt. No, I have the wall hanging needing about 30 hours of hand quilting and the quilt top that turned out bigger than my kitchen.
It has FINALLY stopped going below zero at night, which means summer's coming, which means it's time for a lightweight bed quilt, which means: quilt top bigger than the kitchen, come on down!!
So the dining room got cleared out for a bit and I confronted the two lengths of Kona in Natural that are slated for the backing, couldn't find the pieces I'd cut for the pieced backing, got wise and scrapped that plan anyway, decided to piece the backing vertically instead, and got to trimming, ironing, and piecing.
The dog helped immensely.
And now my design wall is pretty again.
Okay, so I cleared out the dining room so that I could lay out the quilt top and lay the backing pieces on top of it. I needed to measure the top anyway, and don't trust my ability to work out the piecing in my head. This helped me see that piecing vertically would work much better.
I don't know how all these awesome quilters manage such big quilts. Maybe it gets easier with practice? Does anyone have tips for handling pieces of fabric over 44"? Clearing out my dining room is about all I've got at the moment.
Next steps will be ironing the colorful strip and then sewing the back together. And then... basting. And then... quilting. Hoo boy.
Happy crafting!
And then the baby fell asleep, and I swung into crazy, hopeful action. As I'd mentioned, I have no handy UFOs that I could pull out and work on in a staid, leisurely way. No pretty stack of blocks or thing all basted and ready to quilt. No, I have the wall hanging needing about 30 hours of hand quilting and the quilt top that turned out bigger than my kitchen.
It has FINALLY stopped going below zero at night, which means summer's coming, which means it's time for a lightweight bed quilt, which means: quilt top bigger than the kitchen, come on down!!
So the dining room got cleared out for a bit and I confronted the two lengths of Kona in Natural that are slated for the backing, couldn't find the pieces I'd cut for the pieced backing, got wise and scrapped that plan anyway, decided to piece the backing vertically instead, and got to trimming, ironing, and piecing.
The dog helped immensely.
And now my design wall is pretty again.
Okay, so I cleared out the dining room so that I could lay out the quilt top and lay the backing pieces on top of it. I needed to measure the top anyway, and don't trust my ability to work out the piecing in my head. This helped me see that piecing vertically would work much better.
I don't know how all these awesome quilters manage such big quilts. Maybe it gets easier with practice? Does anyone have tips for handling pieces of fabric over 44"? Clearing out my dining room is about all I've got at the moment.
Next steps will be ironing the colorful strip and then sewing the back together. And then... basting. And then... quilting. Hoo boy.
Happy crafting!
4.11.2014
Horseshoes and Hand Grenades
Another Friday Finish! I won't be able to keep this up much longer, but it's been fun.
This is a strip quilt, done using Molli Sparkles's tutorial for string piecing without a foundation. I varied the width of the strips to maximize scrappiness. I wanted my finished squares to end at 5", which they almost did. His tutorial yields 3.5" finished squares, so based on careful math, I determined I'd need my initial fabric strip to be... bigger.
My math was totally correct, but then I did something wrong making the first cut of the second set of cuts (perpendicular to the first set) and was left with a couple pieces that were almost squares, but not.
At first I was thinking about a checkerboard using the darker fabrics of the strips but decided that the center of the quilt was busy enough that the border needed more of a "Go home, quilt, you're drunk" vibe. So the plain white-on-white is like a place for the eye to rest/a lamppost to lean against on the stagger home.
Having not thought at all about the quilting until it was basted, I decided to quilt a spiral out from the center of each square. After burying the brillion ends of the ticker tape quilt, a few dozen no longer seems like a lot. I used to go to great lengths to avoid stopping and starting in the middle - no longer! Then I stitched some straight lines in the border. As I turned onto the second side, I couldn't remember what part of the presser foot I was measuring against. Guessed wrong, repeated the mistake on the other end of the quilt, and called it a design element.
The binding is a 13-color floral print from JoAnn's that I've had for years. It's used in the top, too, and I liked how it was dark enough to provide a nice frame for the quilt, but still variegated. I sewed over half of it down in the car on a long trip to and from the vet yesterday. Not sure me + sewing needle + moving car is the best combination, but it did help me finish in time for this post.
If I ever make another quilt this way, I'll use thinner strips - the biggest finished at a bit over 2", and I like the effect more when they're under 2".
Linking again to Crazy Mom Quilts for Finish It Up Friday.
Happy crafting!
This is a strip quilt, done using Molli Sparkles's tutorial for string piecing without a foundation. I varied the width of the strips to maximize scrappiness. I wanted my finished squares to end at 5", which they almost did. His tutorial yields 3.5" finished squares, so based on careful math, I determined I'd need my initial fabric strip to be... bigger.
My math was totally correct, but then I did something wrong making the first cut of the second set of cuts (perpendicular to the first set) and was left with a couple pieces that were almost squares, but not.
| Scrappy back - this shot shows the quilting better than the ones of the front. |
The back is something of a mess, but it's a thrifty mess. I threw together a second set of strips, cut more squares that were fully squares, and finished the main part of the top. Then it sat on my design wall for a while, until I made a decision about borders.
| My favorite block is the top left. |
At first I was thinking about a checkerboard using the darker fabrics of the strips but decided that the center of the quilt was busy enough that the border needed more of a "Go home, quilt, you're drunk" vibe. So the plain white-on-white is like a place for the eye to rest/a lamppost to lean against on the stagger home.
| Quilting detail |
The binding is a 13-color floral print from JoAnn's that I've had for years. It's used in the top, too, and I liked how it was dark enough to provide a nice frame for the quilt, but still variegated. I sewed over half of it down in the car on a long trip to and from the vet yesterday. Not sure me + sewing needle + moving car is the best combination, but it did help me finish in time for this post.
If I ever make another quilt this way, I'll use thinner strips - the biggest finished at a bit over 2", and I like the effect more when they're under 2".
Linking again to Crazy Mom Quilts for Finish It Up Friday.
Happy crafting!
4.08.2014
My Iron Goes Rogue
Like most people, I'd imagine, I'd been happily walking around and thinking of my iron as having two basic settings: "On" and "Off." Well, just recently I noticed that my iron now has three basic settings: "Not Plugged In," "Plugged In," and "Steam."
We should back up.
First of all, my iron is not even really my iron. It was given to my husband by his mother well before he took up with a quilter. He didn't believe me that it had been his when we were discussing the iron/possible demon possession (more on that in a moment), but that's because he probably never used it anyway.
This is a good, hardworking iron and has served me faithfully through such events as The Great Fall off the Table of 2004, and the Orooni Learns Not to Use Well Water in the Iron Mess of 2010.
There's no way for me to tell the rest of this story without looking like a weirdo, but meh, I'm okay with that - will be a nice change of pace from looking like a bumbling idiot. So, my Ticker Tape quilt came out of the wash looking a bit more rumpled than I would've liked, and I decided to try to straighten it out a bit before hanging it up. (It came out this way because I washed and dried it in a lingerie bag that was a bit too small for it because I was worried about threads coming off of the tapes and destroying my new-ish and beloved washer and dryer.)
I plugged the iron in, then put the quilt face-down on the ironing board. (Here's the weird part.) Then, for some reason, I put the iron down on the quilt and pressed a bit. When I lifted the iron off, the quilt was warm. This was curious, because I hadn't turned the iron on yet. Naturally, what you do in this situation is immediately touch the iron to see if it's hot. (Whoops, looks like we're back to looking like a bumbling idiot.)
And yes, the iron was hot!
Given that one of my cardinal quilting rules is to never, ever iron batting or finished quilts, I think I must have been seeing if a cold iron would flatten the quilt out. Otherwise, I have no idea why I was ironing - pretending to iron? - the quilt.
Anyway, I burned my finger a bit and concluded that my iron was now inhabited by a ghost. Or perhaps it was defying laws of physics in new and interesting ways and could be studied for Science. I discovered that it wasn't hot enough to steam, so I turned it to "Steam" and steamed the quilt into a bit flatter state.
Then I unplugged it and gave it the side-eye for the rest of the day. When Other (significant) came home, I told him about the iron being hot despite being off. He asked if I thought it was possessed, and I told him that it had been unplugged for a while, and that he should touch it to see if it was hot/possessed. He did, and sadly there will be no scientific leaps based on my iron for now. It's just broken.
Now, if you're worried about me burning my house down with a broken iron, I don't blame you. That does seem like the sort of stupid thing an Iron-Toucher would do. However, you will be relieved to know that I've never trusted this iron anyway and am in the habit of leaving it unplugged.
Habit will save us all!
We should back up.
First of all, my iron is not even really my iron. It was given to my husband by his mother well before he took up with a quilter. He didn't believe me that it had been his when we were discussing the iron/possible demon possession (more on that in a moment), but that's because he probably never used it anyway.
This is a good, hardworking iron and has served me faithfully through such events as The Great Fall off the Table of 2004, and the Orooni Learns Not to Use Well Water in the Iron Mess of 2010.
There's no way for me to tell the rest of this story without looking like a weirdo, but meh, I'm okay with that - will be a nice change of pace from looking like a bumbling idiot. So, my Ticker Tape quilt came out of the wash looking a bit more rumpled than I would've liked, and I decided to try to straighten it out a bit before hanging it up. (It came out this way because I washed and dried it in a lingerie bag that was a bit too small for it because I was worried about threads coming off of the tapes and destroying my new-ish and beloved washer and dryer.)
I plugged the iron in, then put the quilt face-down on the ironing board. (Here's the weird part.) Then, for some reason, I put the iron down on the quilt and pressed a bit. When I lifted the iron off, the quilt was warm. This was curious, because I hadn't turned the iron on yet. Naturally, what you do in this situation is immediately touch the iron to see if it's hot. (Whoops, looks like we're back to looking like a bumbling idiot.)
And yes, the iron was hot!
Given that one of my cardinal quilting rules is to never, ever iron batting or finished quilts, I think I must have been seeing if a cold iron would flatten the quilt out. Otherwise, I have no idea why I was ironing - pretending to iron? - the quilt.
Anyway, I burned my finger a bit and concluded that my iron was now inhabited by a ghost. Or perhaps it was defying laws of physics in new and interesting ways and could be studied for Science. I discovered that it wasn't hot enough to steam, so I turned it to "Steam" and steamed the quilt into a bit flatter state.
Then I unplugged it and gave it the side-eye for the rest of the day. When Other (significant) came home, I told him about the iron being hot despite being off. He asked if I thought it was possessed, and I told him that it had been unplugged for a while, and that he should touch it to see if it was hot/possessed. He did, and sadly there will be no scientific leaps based on my iron for now. It's just broken.
Now, if you're worried about me burning my house down with a broken iron, I don't blame you. That does seem like the sort of stupid thing an Iron-Toucher would do. However, you will be relieved to know that I've never trusted this iron anyway and am in the habit of leaving it unplugged.
Habit will save us all!
4.06.2014
Sunday Stash
Right now, the quilty blogosphere is reminding me of the knitty/yarny blogosphere before Ravelry came along. I've loved exploring all these great blogs through various linky parties, so I'm making a tiny effort to participate. Today I'm linking up to Molli Sparkles.
That said, I probably won't do many Sunday Stashes because I don't buy new fabric all that much, and because I barely know what day of the week it is anymore.
On to the fabric!
Above we have Little Flowers in Licorice (Ann Kelle) , Buttons in Purple (Jenean Morrison), and Geo in Natural (Dena Fishbein). Surprise! - the buttons aren't really buttons.
Honeycomb in Marmalade (Bonnie Christine), Scattered Violets in Orange (Mo Bedell), and Lace in Red (Doodlebug Designs). Honeycomb was a pleasant surprise - I like it more in person than I did on the site.
And finally, here's Trees in Green (Deena Rutter), Dancing in Waltz (Pat Bravo), and Posh in Bright (Pat Bravo). These top two green fabrics are part of my ongoing green-related quest, but I won't go into that now. I'll save it for sometime when I don't have new fabric and my quilting update reads like: "I got to work on my quilt while the baby slept! I stared at my design wall, thought a bunch, wrote down some numbers on a piece of paper, then slapped some white borders on!"
None of these new additions have specific plans attached. Reading all these blogs and seeing all these beautiful quilts has got me thinking about my fabric stash - given that I tend to do patchworky smaller projects and go for long periods where I can't quilt, I rarely run out of stuff or use up a whole cut of fabric. Buying new fabric thus represents quite a commitment. This little shipment made me very happy. Off to wash them now.
Happy crafting!
That said, I probably won't do many Sunday Stashes because I don't buy new fabric all that much, and because I barely know what day of the week it is anymore.
On to the fabric!
Above we have Little Flowers in Licorice (Ann Kelle) , Buttons in Purple (Jenean Morrison), and Geo in Natural (Dena Fishbein). Surprise! - the buttons aren't really buttons.
Honeycomb in Marmalade (Bonnie Christine), Scattered Violets in Orange (Mo Bedell), and Lace in Red (Doodlebug Designs). Honeycomb was a pleasant surprise - I like it more in person than I did on the site.
And finally, here's Trees in Green (Deena Rutter), Dancing in Waltz (Pat Bravo), and Posh in Bright (Pat Bravo). These top two green fabrics are part of my ongoing green-related quest, but I won't go into that now. I'll save it for sometime when I don't have new fabric and my quilting update reads like: "I got to work on my quilt while the baby slept! I stared at my design wall, thought a bunch, wrote down some numbers on a piece of paper, then slapped some white borders on!"
None of these new additions have specific plans attached. Reading all these blogs and seeing all these beautiful quilts has got me thinking about my fabric stash - given that I tend to do patchworky smaller projects and go for long periods where I can't quilt, I rarely run out of stuff or use up a whole cut of fabric. Buying new fabric thus represents quite a commitment. This little shipment made me very happy. Off to wash them now.
Happy crafting!
4.04.2014
Ticker Tape Quilt
This quilt scratched an itch for me, as well as opening the quilting floodgates - there's a 16-block red and orange string quilt top on my design wall now, and I'm currently hashing over my options for borders for it.
Here it is after thread burying and binding but before washing. Fifty-eight or 59 squares, plus one time when I ran out of bobbin thread yielded about 230 little tails to bury. When I chose a quick quilt, 230 tails were not part of my calculation. I did consider washing the thing and then clipping the tails without burying them, but just couldn't do it.
I enjoyed putting this together, because I've made few enough quilts that I remember what project(s) each of these has been used in, and it's fun to see them all being used together. Some fabrics that didn't make it into the top were used in the pieced binding. The color effect of the pieced binding is nice, but all the seams make it rather lumpy.
Stats:
Title: "I Like THAT One!"
Batting: Hobbs Warm & Natural
Backing: Jo-Ann green floral FQ bought for Daughter 2's quilt and rejected for being too lime
Thread: Connecting Thread Essential white
Finished Size: 16"x18.5"
Notes: First spray-basting used, first pieced binding
In the interest of getting this on the wall quickly, I sewed rings on the top two corners rather than make a hanging sleeve.
Here it is in all its on-the-wall glory. Felt really good to put up some color, and inspired me to get a couple more things on the wall.
Linking up with Crazy Mom Quilts for the first time!
Happy crafting!
Here it is after thread burying and binding but before washing. Fifty-eight or 59 squares, plus one time when I ran out of bobbin thread yielded about 230 little tails to bury. When I chose a quick quilt, 230 tails were not part of my calculation. I did consider washing the thing and then clipping the tails without burying them, but just couldn't do it.
I enjoyed putting this together, because I've made few enough quilts that I remember what project(s) each of these has been used in, and it's fun to see them all being used together. Some fabrics that didn't make it into the top were used in the pieced binding. The color effect of the pieced binding is nice, but all the seams make it rather lumpy.
Stats:
Title: "I Like THAT One!"
Batting: Hobbs Warm & Natural
Backing: Jo-Ann green floral FQ bought for Daughter 2's quilt and rejected for being too lime
Thread: Connecting Thread Essential white
Finished Size: 16"x18.5"
Notes: First spray-basting used, first pieced binding
In the interest of getting this on the wall quickly, I sewed rings on the top two corners rather than make a hanging sleeve.
Here it is in all its on-the-wall glory. Felt really good to put up some color, and inspired me to get a couple more things on the wall.
Linking up with Crazy Mom Quilts for the first time!
Happy crafting!
4.02.2014
Adventures in Spray Basting
I'm on maternity leave right now, and was expecting to be completely sleep-deprived and generally barely-functional. To my cautious delight, however, this baby is not opposed on principle to sleeping, and often does it voluntarily.
Knowing I'd have a tiny one, I sat out this round of Sock Madness and braced myself to go on another crafting hiatus. It's a special kind of pain to spend all your time looking at quilting blogs and Ravelry while not being able to work on anything. These are the periods during which my to do list explodes into hopeless territory.
The fact that we've just moved into a new house, with acres of bare wall just asking to be covered in vibrant fabric isn't helping.
So, what the heck. In one 30-second window, I brought out the scrap bin. In another, got out and assessed my white fabrics. In another, picked one and took it to the work table. Piece by tiny little piece, I cobbled together the top of a ticker tape quilt, meant to hang between the kitchen and living room.
Now, if you ever plan to make a ticker tape quilt, you should really plan to assemble the quilt pieces (background fabric, batting, backing) before determining the placement of all the little squares. Really. I didn't, which resulted in a stupid process of trying to move the top + tapes onto a spray-basted piece of batting, then lots of swearing and cursing of myself, then consulting my camera to realize I hadn't taken a picture of the completed layout, then more cursing.
I could've waited to place everything until I had another pair of adult hands around to help, or I could've waited until I had spray basting to start putting the whole quilt together, but I've decided that if progress is going to be made, I must do what I can with what I have when I have it. Lots of cursing it is, then.
Also in the name of many tiny steps, I've picked my hand quilting project back up. I don't have tons of quilting UFOs, and the two others that come to mind are gigantic projects, not fit for quick wall coverings. This one is a Hawaiian quilt I started way back in 2004, or 2005, or thereabouts. It was done in a weeklong workshop and had only the outline of the applique and the first echo completed. I knew I was waaaaay out of practice with hand stitching, but if this thing is ever going to get done, I've got to keep moving forward, so I just accepted that there are going to be some visible learning curve stitches. And there are. But, the great thing about this type of quilt is that the effect of so much echo quilting is that you don't notice that the second ring looks like it was done by someone who hadn't hand quilted in seven years.
There's a lot left to do here, but seeing progress really helps.
Happy crafting!
Knowing I'd have a tiny one, I sat out this round of Sock Madness and braced myself to go on another crafting hiatus. It's a special kind of pain to spend all your time looking at quilting blogs and Ravelry while not being able to work on anything. These are the periods during which my to do list explodes into hopeless territory.
The fact that we've just moved into a new house, with acres of bare wall just asking to be covered in vibrant fabric isn't helping.
So, what the heck. In one 30-second window, I brought out the scrap bin. In another, got out and assessed my white fabrics. In another, picked one and took it to the work table. Piece by tiny little piece, I cobbled together the top of a ticker tape quilt, meant to hang between the kitchen and living room.
Now, if you ever plan to make a ticker tape quilt, you should really plan to assemble the quilt pieces (background fabric, batting, backing) before determining the placement of all the little squares. Really. I didn't, which resulted in a stupid process of trying to move the top + tapes onto a spray-basted piece of batting, then lots of swearing and cursing of myself, then consulting my camera to realize I hadn't taken a picture of the completed layout, then more cursing.
I could've waited to place everything until I had another pair of adult hands around to help, or I could've waited until I had spray basting to start putting the whole quilt together, but I've decided that if progress is going to be made, I must do what I can with what I have when I have it. Lots of cursing it is, then.
Also in the name of many tiny steps, I've picked my hand quilting project back up. I don't have tons of quilting UFOs, and the two others that come to mind are gigantic projects, not fit for quick wall coverings. This one is a Hawaiian quilt I started way back in 2004, or 2005, or thereabouts. It was done in a weeklong workshop and had only the outline of the applique and the first echo completed. I knew I was waaaaay out of practice with hand stitching, but if this thing is ever going to get done, I've got to keep moving forward, so I just accepted that there are going to be some visible learning curve stitches. And there are. But, the great thing about this type of quilt is that the effect of so much echo quilting is that you don't notice that the second ring looks like it was done by someone who hadn't hand quilted in seven years.
There's a lot left to do here, but seeing progress really helps.
Happy crafting!
3.31.2014
87 Down
My sock-knitting juggernaut grinds towards 100 completed pairs - pair 87 is done and dusted, and will be making the journey to their new home just as soon as I can get to the post office. (Merry Christmas, Lady!)
The disparity in color between the two socks is not a trick of the light, unfortunately. The skein was distinctly darker at one end than the other. I'm not happy about that. The yarn and resulting socks are lusciously soft, though.
Yarn: Dream in Color Smooshy with Cashmere in Fierce Scarlet
Pattern: True Love
Modifications: knit cuff-down instead of toe-up, following the chart backwards
This was something of an experiment - I wasn't sure how going the other direction on the chart would turn out. The pattern is distinct enough, but the cables don't look as smooth to me as they do on the original. I suspect I should have flipped some stitch with one in the opposite direction, but for my life I can't grok exactly what that would be.
Two other pairs are on the needles and over halfway done, so even though progress has slowed down a lot, it hasn't stopped.
The disparity in color between the two socks is not a trick of the light, unfortunately. The skein was distinctly darker at one end than the other. I'm not happy about that. The yarn and resulting socks are lusciously soft, though.
Yarn: Dream in Color Smooshy with Cashmere in Fierce Scarlet
Pattern: True Love
Modifications: knit cuff-down instead of toe-up, following the chart backwards
This was something of an experiment - I wasn't sure how going the other direction on the chart would turn out. The pattern is distinct enough, but the cables don't look as smooth to me as they do on the original. I suspect I should have flipped some stitch with one in the opposite direction, but for my life I can't grok exactly what that would be.
Two other pairs are on the needles and over halfway done, so even though progress has slowed down a lot, it hasn't stopped.
Subscribe to:
Posts (Atom)