10.09.2010

I am not a hunter.

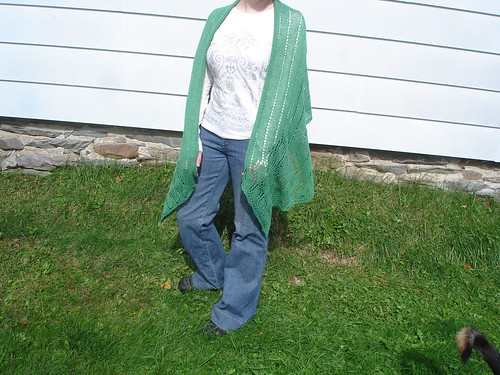
But I think I now understand the urge to stuff something you've conquered and mount it on your wall. Behold, Juno Regina:

2010 10-3 002

And hey, here I am wandering around the yard:

2010 10-3 004

For a brief bit there, I wished for some kind of ball or gala to attend, because without one this will quickly be scrunched up and worn as a scarf. It will be a great scarf, though.

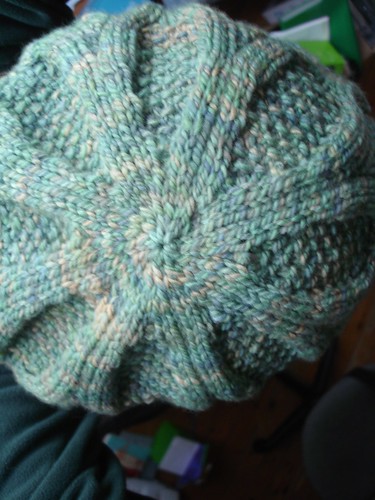
And then, before I even realized what had come over me, I cast on for a hat. A nice simple hat in worsted weight yarn.

2010 10-3 013

And then, just as I had noticed what was happening, I finished it:

2010 10-8 005

Et voila, a lovely and warm beret. From Knitty, the Brambles Beret in River Twist from Mountain Colors in the Whitewater River colorway. Used .77 skeins, with enough left over for some coordinating scarf or mittens. Maybe they'll appear when I come to after finishing Icarus...

9.28.2010

Oh, fu--

I'm knitting along happily, so happily, too happily on Juno Regina. Stop for the first time to check if I'm close to starting the last set of charts, and see - shazam! I'm right there! Don't have to frog at all! Don't need to keep knitting! Perfect timing! Start the charts. Takes five tries, but I do the first row right. And then I notice that the chart for the first and last stitches of each row looks a little bit more like a checkerboard than I remember.

And I've been doing the leading and ending stitches in garter for... check the shawl... since I finished the charts for the first ends.

And before that... check the shawl... I was doing seed stitch.


LOUD NOISES. PROFANE LANGUAGE.

That moment of realization. That moment where the evidence six inches from your nose says to you, hey, you've just f*#@$! up *months* worth of knitting. AHHHHHHHHH.

So, wait. Can I live with the ends in seed stitch and the middle in garter? (And keep in mind, this is just the edge stitches. Barely noticeable.) Yes. Theoretically I can. I could just start the seed stitch again and move on with my life.

But upon further reflection, I realize that I've been doing garter stitch in all purls (not all knits), and the row was supposed to start and end with a purl, so theoretically I should be able to drop the column of middle stitches all the way down the edge and then pick up those stitches in seed stitch. Not ideal, but didn't EZ do that sort of thing to put in false seams after knitting a whole stockinette sweater body in the round? I'm pretty sure she did.

Alright. Rock and roll, I'm McGuyver, hand me a locking stitch marker and we're going in. I take the first stitch off, the edge stitch, and trap it with a stitch marker, then slide all the other stitches down to the safe end of the needle. (I'm confident I can handle the middle stitch, but edge stitches do not play nice with me. If I drop an edge stitch and it goes anywhere, I am utterly screwed. I know this about myself.)

Then I drop down the middle stitch for FEET and FEET of knitting.


And then I think... wait, am I actually right that picking up the middle stitch in seed will work? Will that produce seed stitch or a weird kind of ribbing?

Panic sets in.

AAAAHHHHHHHHHH.

Wait, brain says. Before you commit to a panic attack, just try picking it up in seed.

So I did. And it worked.

So I just spent an HOUR picking up a stitch for FEET and FEET of knitting.

And that was just the first side.


Things We Have Learned Today

  1. Okay, your intuitive grasp of the relationship of seed stitch to garter is surprisingly good.
  2. Your explicit grasp of the relationship of seed to garter is alarmingly bad.
  3. This means you should probably never try to explain it to anyone.
  4. Maybe, you should try something out on, say, 3 rows of stitches, rather than 300, if you're not sure it's going to work.
  5. Looking at the pattern at least once every three months might be a good policy too.
My latest plan is to focus on one WIP at a time until my plate is a little more clear. Well, I'll try. Yeah.

9.16.2010

Talk about socks

We're welcoming more socks to the family. First, stockinette socks in Knit Picks Felici Sport in Sorcery:

These are for Mom - 60 sts on 2.5mm (size 1 or 1 1/2, depending on who you ask), some 2x1 ribbing at the top, long-ish heel flaps. For some reason before I touched the Felici Sport, I imagined it to be on the rough side. Not so. It's very soft, and the plies separate easily and it knits like butter. Lovely.


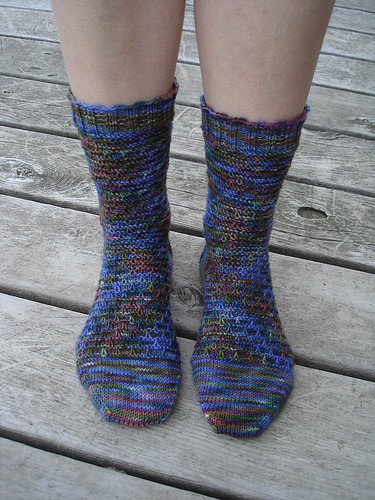
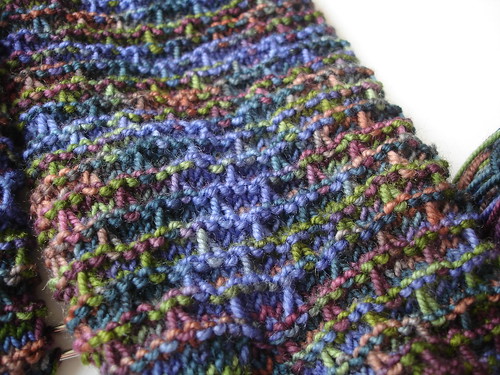
These are Jules socks in Patons FX, colorway Clover, over 64 sts on size 1 (2.25mm) needles. Lots of failing to follow the pattern and frogging, but frogging is bothering me less and less. I went well over 2 skeins, and I think you can kind of tell on the soles where I switched to a new skein. The slip-rib pattern on the top of the sock hides the transition pretty well, as does the overall nature of the color changing.

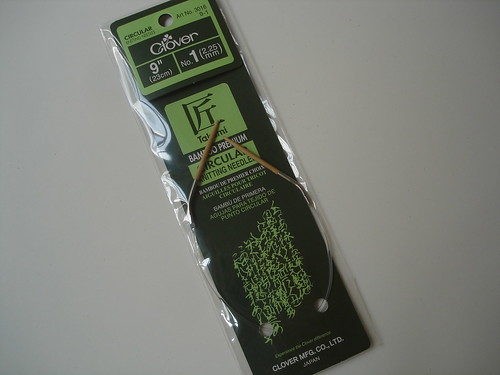
Right now sock-knitting is fitting into my life as something that fills in the cracks and doesn't get too much attention of its own. This is also coming at a time when I've got an awesome new sock book (thanks, Mom!), New Pathways for Sock Knitters, to explore and the nagging sense that my stash of sock yarn should really be used on intricate, more difficult, and attention-requiring patterns, rather than simple stockinette or rib or a repeat of a pattern I've already done. I also have a nice, long KP size 1 needle with which to try Magic Loop, as well as the 9" size 1 bamboo circ to try out. And a mile-long list of patterns I've been wanting to try out.

I guess what I'm saying is that I should really give some time to starting new sock projects. At the same time, I don't want to completely give in to that nagging feeling, because I actually deeply love knitting plain-ish socks.

9.06.2010

Pouches! And a sort-of tutorial.

Knitting and creating in general basically came to a screeching standstill while we moved house. Now that we're here and settled in a bit, the quilting bug has come back with a vengeance, and I've finished up a wall quilt that only needed some binding and a hanging sleeve, and yesterday I made up a couple of pouches intended to carry the little Garmin navigational systems that my brother got various family members for Christmas last year.

Quilted Pouch Tutorial

You will need:

Exterior fabric
Interior fabric (lining)
A sewing machine or mad hand-sewing skillz
Thread to match exterior, interior, both, or neither
A zipper (I used a polyester Coats one, which are ubiquitous at craft stores)
Batting
Cutting tools - I used a self-healing mat and rotary cutter, as well as two sewing rulers
A non-machine needle and passable hand-sewing skills (just for sewing the turning hole closed)


My goal was a pouch that would both keep the cord stored with the main piece as well as that would offer a little protection from bumps and scratches and theivery. To that end, I wanted to use batting rather than interfacing. (Pictured here is Warm & Natural batting, but I ended up using some leftover Heirloom (I think) batting, probably 100% cotton.

I didn't find a tutorial for exactly what I was looking for, so I based my creation off of this tutorial from Pin and Paper as well as a dash of this tutorial from Make it Modern and this one from Skip to My Lou. The sewing exterior parts together and interior parts together came from the first and last one, and the way of handling the bottom corners came from Make it Modern, for the record.

I found it very hard to wrap my brain around the construction -- which part is facing up, which is facing down, why, etc. If you also have a problem with this, it may be helpful to think of this as similar to the "envelope" construction used in some quilts, where you pile up the backing (face-up), then the front (face-down), then the batting (doesn't matter which side is which), sew around, then turn through a turning hole. You're not doing exactly that, because at no point do you sew the lining to the exterior, but when you're attaching everything to the zipper, this is sort of the model you follow.


My zippers were 7" long, so I went with pieces of fabric for the exterior and lining that were all 7 1/2"x7 1/2" (to include a 1/4" seam allowance). If you happen to want to make a carrier for a Garmin Nuvi 260W and its cord, you could probably get away with the pouch being 2" shorter. You can make just about any size you want, provided that your width isn't more than the real width of your zipper. (It's also easy to shorten a zipper, so if you want something smaller than your zipper, just follow the instructions that came with it on how to shorten it.)


I hesitate to write up official tutorials for things, because that implies that I think of myself as remotely qualified to advise people on how to do stuff with sewing. I really don't, so please understand that this is what I did and it worked for me without much fudging or cursing (although there was some cursing).

That said, because I was going off on my own in terms of the batting, I was pretty confident that overlapping 2 layers of batting would give me a lot of bulk at the seams that a) I didn't want and b) was probably unnecessary. So, I cut the original squares for batting to 7"x7", which, I figured, would result in approximate meeting of the batting pieces right at the seam. Then I placed each batting square on top of the wrong side of each exterior square, 1/4" from each side, and pinned them at the corners.


While ideally the whole pouch would be quilted (exterior, batting, and lining), the inside/outside construction process doesn't really allow for this. Short of covering the seams with something, as in this tutorial, I couldn't think of a way to quilt through everything and have the seams be neat or hidden. So I just quilted the outside to the batting, using a walking foot (because that's what happened to be on my machine at the time) and a whimsically not-exactly-straight back-and-forth quilting pattern. Because whimsy is very important. For each square, I started at what would become the upper-left edge, quilted to a bit before what would become the 1/4" seam allowance, turned 90 degrees, quilted for an inch-ish, and turned again to go back toward the other edge, thus making my way down the block.


Apparently I didn't take pictures of this middle part. (So helpful! Sorry. The tutorials I linked above have good pictures of how to sew each part to the zipper and then assemble the whole bag.)

Basically, what you do is put the lining face-up on the table, then put the zipper face-up on top of that. Then you place the batting/exterior on top of that, matching the top edges, and with the batting part facing up. You're going to sew all of these parts together 1/4" of an inch from the top, and you're actually working on the side of the zipper that's uppermost at this point. I used 4-5 pins across, and opened the zipper partway, then paused in my sewing to move the zipper out of the way when the foot got close to it but wasn't going over it yet. (You stop with the needle down, through all the layers -- that's very important -- then lift up the foot and push the zipper under it in whichever direction it needs to go. This was tricky sometimes - don't force it too much, because it's mostly about needing to find the angle that will get the zipper to move.)

The batting spread out a bit during quilting, but in general when you sew the pieces together at this part, you'll be working right along the edge of the batting.

Once you've sewn across this, flip the interior and exterior piece toward each other, revealing the zipper, and press them open -- I just finger-pressed -- then sew through all the layers along the zipper. I didn't use a 1/4 seam allowance for this - just stayed pretty close to the edge of the fabric.

Repeat this process for the other side - lining face-up, zipper, exterior face-down, then finger-press and sew that side along the zipper.

If you want to add a little handle, make it now. (I added a handle to one pouch.) Decide how wide/long you want it to be, then double the width and add 1/2" to both the width and length for seam allowance. (I wanted it to end up being about 1 1/4" across, and 7" long (halved, of course, once it's attached), so I cut a piece of exterior fabric 3"x7 1/2".) Fold this piece in half lengthwise, wrong side out, and sew along the long edge 1/4" in. I finger-pressed this seam open, then turned right-side-out and sewed two lines lengthwise 3/8" in from either side. My 7" long handle, once attached, is too little to go over my wrist, so if you want to make this a wristlet, make sure to measure to figure out how long it should be.

Then you flip the interiors together (wrong sides out) and the exteriors/battings together (wrong sides out). If you're adding a handle, fold it so that the sides of the handle you want facing out are currently facing out (i.e., the seam faces in or to the side, depending on your preference) and insert it between the exterior pieces before pinning everything. I matched the edges of the handle up with the edges of the exterior fabric, and placed it right at the top edge, just below the zipper.

Be sure that before you start pinning everything, the zipper is at least 3/4ths of the way open.

Pin all the way around the rectangle, half of which is your exterior and half of which is your interior. Leave about 2" of the bottom un-pinned (and un-sewn) so that you can turn this rectangle inside-out once you're done sewing.

I followed the tutorial's directions to pin the zipper toward the lining. This was hard to get my brain around, but I took it to mean that the edges of the zipper should be pinned against the lining rather than the exterior part.

When I sewed around the rectangle, I went very carefully over the zipper, because I've bent the crap out of a needle before when it hit an unyielding piece of zipper. I actually hand-walk the machine for these parts and go back and forth over them at least twice.


If you want your bag to stand up, don't do what I did on my first bag and get all excited that you're done with the hard part, turn everything right-side-out, and sew the turning hole closed. Now is the time to square off your corners.

For both the exterior parts and interior parts, you need to sew a seam perpendicular to the seams that are currently there in the corners. Some tutorials have you cut notches in the corners, but I prefer the mark-sew-cut way, which is described nicely in the Make it Modern tutorial linked above. Line up the bottom seam and the side seam, as in the photo, and use your ruler to determine where the corner is 2" across. Mark that line, then sew across it. Cut the corner off, leaving about a 1/4" allowance. Using pinking shears for this step is a good idea, if you have them.

Repeat this step for each bottom corner, two on the lining and two on the exterior. You may want to go a wee touch over 2" for the lining, so that it's just slightly smaller than the exterior. I didn't, though, and it worked just fine.

Now you're going to turn the whole shebang inside-out (or right-side-out, as the case may be) and using an itty-bitty whip stitch, sew the turning hole in the lining closed. Then push the lining down into the pouch and admire!


Here are my finished pouches -- the one on the left has the corners squared, and the one on the right doesn't.


Some gratuitous yay-I'm-done! shots:


I like this pouch because it says, "I am full of makeup and girlie things!" rather than "I am full of an expensive navigational device that you should steal!" And because I can leave it in the car, it prevents the Garmin cord from attacking me as I'm trying to get my wallet out at the grocery store. Win-win-win.

I will gladly answer questions about making this pouch, and if there are ways my tutorial could be clearer -- other than featuring pictures of the tricky parts (duhh) -- please feel free to contact me. I may not be so helpful, though, because generally I just wing stuff. If there is a great demand for pictures of the tricky parts, I'd be happy to make another pouch and actually document it. Just let me know. My e-mail is my Rav name at G mail.

8.01.2010

Let's just go ahead and re-name it Yarnday.

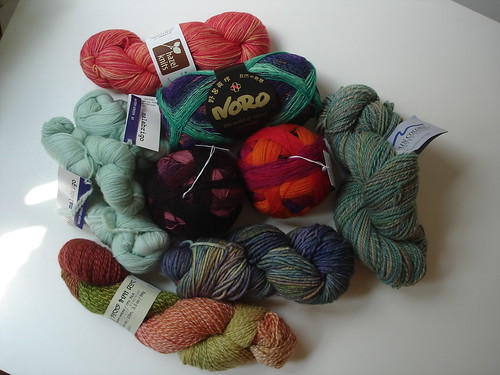
Instead of tending my knitting blog, I have been off gallivanting around and experiencing some Major! Life! Changes! recently, the least of which was a milestone birthday for which I, in what is becoming a tradition, received a honking pile of gorgeous yarn.

2010 8-1 011

I'm practically jealous of myself.

That's two Zauberball Lace skeins in the middle, Brombereen on the left and Fuchsienbeet on the right. Then on the far left is Malabrigo Lace in Water Green, three skeins. Above that is Hazel Knits Artisan Sock in Strawberry Lemonade, and immediately below that is Noro Kureyon Sock, colorway 219. On the far right is River Twist from Mountain Colors, colorway Whitewater River. Below the Zauberballs is a skein of Malabrigo Twist in Indecita, and below that is Socks that Rock Silkie in ST-1.

2010 8-1 030

Ah, and here it is again, the cheeky vamp. This was discovered on a trip to WEBS, and it was a shock, because if I'd known that WEBS stocked STR, I wouldn't have kept away for so long. Wonder when that happened.

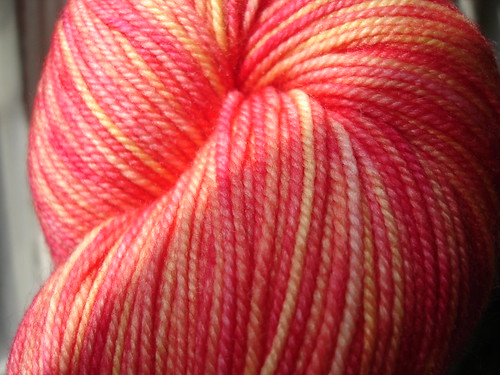
I went a little crazy taking pictures of the Hazel Knits, too:

2010 8-1 023

Doesn't that look good enough to eat? I've got ideas for every skein except this one -- what could possibly be worthy of such gorgeous color? I've got to think of something that I will use every day, no matter the weather. And that will not be exposed to direct sunlight and that won't be subject to too much wear, so that it lasts forever.

I'm also excited about this little gift:

2010 8-1 039

that I suspect will take stockinette sock knitting to whole new levels of speed.

The problem with this glorious bounty is that I want to cast on every single skein NOW NOW NOW, but there's plenty on the needles already that needs attention. For instance, there's Ms. Shawl:

2010 6-26 001

who is just now ready to start on Chart 2, the first of the edging charts. Of course I read the note about how to eliminate repeats of the main section *after* completing the entire repeat I intended to make the last, and of course you're supposed to stop a little early so that the numbers match up for Chart 2. Doh. So that's all frogged and back on the needles and ready to go again.

Then there are two SIPs:

Jules:
2010 8-1 037

and Gentleman's Shooting Socks (for Other):
2010 8-1 040

Oh, and hey, last time I was here, I promised lots of FO shots of socks, so here they are:

Sock Knitters Anonymous May 2010 Mystery Socks, by Cookie A
2010 6-5 009

Classic Elite Summer Socks Solid, colorway Aster, 3 balls


Acorn Socks
2010 6-5 004

Blue Moon Fiber Arts Sock Candy, colorway Chocolate, 2 balls


Pyroclastic Socks
2010 6-16 004

Sunshine Yarns Soft Sock, colorway Grassroots Overdye

And a bad flashy shot of Snicket
2010 6-30 001

Koigu PM, colorway 1115.

Phew.

6.13.2010

Here's the situation:

So, there's this:

Starting with the blue lump, top left, we have: Icarus, Pyroclastic, Snicket (orange), and Hemlock Ring Blanket. Yellow in the middle is the Tiramisu Blanket, and at the bottom is Juno Regina. Six works in progress, one active WIP not shown, and two mostly inactive not shown. All solids or semisolids, oddly enough.


And this:

This is pretty much what it looks like: a big old pile of Wool of the Andes and some rainbow Felici (please don't rob my house for it).

Both of these pictures are just horrid, but the last three New England weekends have been dark and rainy and utterly unhelpful for photographing yarn, so this is as good as we're going to get right now.


I've been very, very good recently and have spent nearly every minute I could working on stuff. I take Juno Regina on the train and get several inches done several times a week -- it's almost onto the second ball of yarn (Knit Picks Gloss Lace in Malachite). Perfect train knitting, because the young innocents riding the subway get to learn all sorts of new vocabulary from me as I realize I've forgotten yet another yarn over.

Icarus (in Knit Picks Shadow Kettle Dyed Lace, color Jay) was started last weekend and I got the first two repeats done. I'm trying not to leave off in the middle of a repeat, so I'm always hesitant to start working on it, worrying that I won't be able to finish where I want. I've got a stretch of time this evening, though, so that should get another repeat tonight.

Pyroclastic (in Sunshine Yarns Soft Sock Yarn, color Grassroots), the only bit of knitting in that photo that doesn't have a deadline, is of course almost done. Started the toe in the car today, and finishing and weaving ends should only take one more session. Woohoo, those have been on the needles for a while.

Snicket is so quick, which must be why I blasted through the first 3 cuff repeats and haven't touched it since. I need to wind the other ball and start the other cuff before figuring out the heel. I've got to say that I don't really understand what the pattern says very well - I just pretty much figured out how I think the pattern is supposed to look and am doing that. It's working okay so far. These should be done before the end of June for sockdown - which, now that I think about it, is soon enough to mean that I should really be working on these more. Hrm.
The Hemlock Ring I finally picked up again and am almost to the feather and fan part. Goes quickly when I actually work on it. Am still deciding between recipients - two very nice families that don't have pets and thus could conceivably get more than a week's use out of a sheep-colored bulky lace blanket before needing to spend an hour cleaning it.

Tiramisu - well, Tiramisu is kind of a hot mess right now. I frogged (do you call it frogging when it's crochet?) my first attempt and started over with 10 more stitches than the pattern calls for, to adjust for my lighter yarn and smaller hook. My gauge (do you call it gauge when it's crochet?) is all over the place, and I always have issues in crochet with the edges - unless I put stitches farther into the edges than it really seems like is possible, my work gets narrower and narrower. Frogged again a couple rows for this, and also realized that part of the problem might be that I was starting on the next row a stitch too far in. Onward, onward, almost done with the first skein. Edging will hopefully hide the ragged edges and save the day.

Of course I'm making smashing progress on the WIP that I can't show you.

That whompin' pile of WoTA also has a deadline, but nothing's been cast on yet. I think I'll spend the rest of the weekend making tangible process on what's already going and then start on that next weekend.

Hopefully my next post will include some finished socks and some sunshine.

5.27.2010

bad impulses

Halloo! Greetings from the Enchanted Land of Secret Knitting. Soon enough (though it's been so long it feels like never) I will be able to show you some things that I've pried off the needles recently. (This also means: Mom, time to go stand by the mailbox.)

Let's focus for now on the Land of Relatively Exciting Recent Developments. Exhibit A: Juno Regina.

2010 4-3 006

This shawl/stole/wrap/lump o' lace is a bit longer than pictured here, after many days of train knitting and train frogging/tinking. Although the entire middle section is a dead simple 2-row repeat (one of which is a purl row), I have made two or three mistakes that resulted in the frogging of inches and inches of knitting. I count it a success if I get through a session and stop farther in the ball than where I started, and I do not always succeed. A quick look at the ball now indicates that the last session involved massive failure.

Despite my two-steps-forward-one-step-back progress, I have a new resolve to concentrate and carefully inspect every row before going forward, and it is growing, slowly.

It is my second shawl for 10 Shawls in 2010, and it's almost June, which, when subjected to cold reason, does not seem to bode well. Also, the sheer will that it's taking to write this post rather than winding yarn and casting on for Icarus is probably another bad sign. Even worse: I just did an advanced pattern search for blankets in laceweight.

Blankets. In laceweight.

I'm actually counting that a victory because it only came to favoriting and queueing, rather than scrapping the Icarus idea, winding the laceweight, and hunting down my 60" size 6 circs.

Speaking of things I probably shouldn't cast on, I've cast on for Snickets:

2010 5-27

I've zipped through the first repeat and a half of the cuff, interpreting the pattern in a way that yields a sock like the picture but that does not seem to be strictly accurate. There is some kind of wonkiness with the first and last stitches of the round to stay in pattern. Whatever, I'm just doing what it seems like one would do. It's working so far.

Finishing stuff is important for morale, though, so I've talked myself out of starting Icarus for now. Plus now I'm not really sure I want to blow all that laceweight on a shawl instead of a blanket.

4.25.2010

Holy neglected blog, batman!

Wow! It's been over a month! I've got so much knitting to chatter on about and show you.

Let's do socks first.

These:

2010 4-17 011

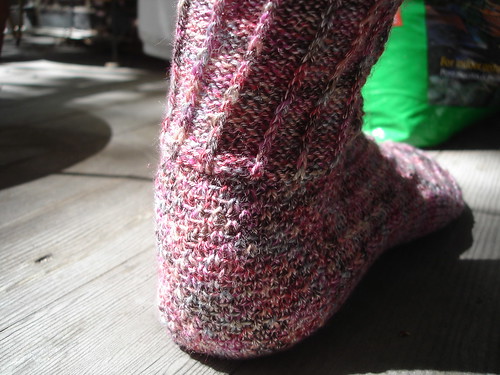
are socks I made for Mom out of STR lightweight in Titania. They are the Negative Bricks Socks by Sockbug with a small Hunter-Hammerstein-esque variation: on the purl row that precedes the slipped stitch row, I set up for the slipped stitches by wrapping each stitch to be slipped around the needle twice instead of once. On the next row, when slipping the stitch, I dropped the extra wrap off the needle. I modified this because the slipped stitches seemed to be awfully tight without that extra length, and having those stitches under such high tension made me uncomfortable. It also scrunched down an already-dense fabric, which didn't really fit with my goal of making the socks as tall as possible.

2010 4-3 004

I think that in addition to soothing my OCD tendencies, the double-wrapping helped to break up the colors a bit more than otherwise would have happened. I think that this is a great pattern for yarns like STR, especially ones with high contrast or many different colors. You might be able to tell from the double ribbing on the cuff how the yarn would have spiraled in a more regular pattern.

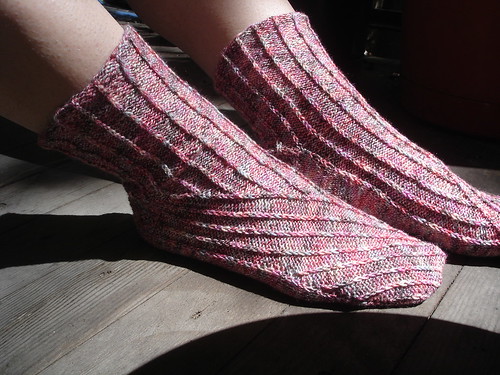
Next up are my Twisted socks for summer, complete with dramatic balcony shadows:

2010 4-24 013

This is the medium size (64 sts) in Regia Bamboo Color that I've had in my stash ever since I decided that I wanted to make long, sock-weight tube scarves out of Regia Bamboo Color, knit the first one, discovered that this yarn is not really soft enough for scarves, and then put the yarn away for four years. Yeah.


I changed nothing about the pattern, and the only thing I thought about changing was the woven-look heel:

2010 4-24 015

My sock heels need to be sturdy -- I've worn holes in three pairs of socks, all, so far, smack in the middle of the heel flap. Having exposed horizontal threads of yarn doesn't seem like a good idea for my particular socks, even though it looks pretty cool. But, I knit a pair of socks out of a different colorway of this yarn in 2006, and have had no problems with holes and although the heel flap has pilled a little, the fabric is so sturdy that I have trouble pulling the pills off with my bare hands. So I figure this yarn can take it.

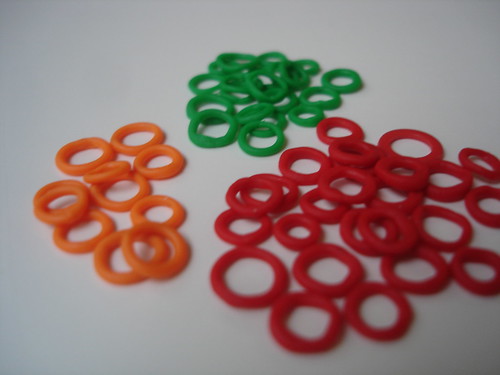
Oh yeah! These socks are also the first pair in which I used my brand new, handmade, teeny tiny stitchmarkers:

2010 4-17 017

I spent a lot of time on a recent visit home making dozens of little circles.

2010 4-17 019

I've found that commercial stitch markers can get expensive, and the sets I've seen (a bendy purple and neon green, and a rigid blue and red - can't remember the brands) don't include very many of the smallest size. Because I mostly knit socks and am doing Ten Shawls in 2010, most of the markers that I need end up being way smaller than most of the ones I have. I lean toward not using them if I can get away with it - maybe because I've been used to not having the right size.

Well, not any longer. I think I ended up with five dozen slightly wobbly but still circular and usable stitch markers when I was done. It took longer to make each one than I was expecting, so these represent a big investment of time. And I've already lost two of the green ones, no idea how.

Finally, I've resurrected Apres Surf, now with reservations about whether it should turn out to be a hoodie.


I've given in and acknowledged that I simply cannot keep track of side decreases and increases on the fly and should not try. Instead, I charted out all the waist decreases before knitting, which allowed me to figure out how that would affect the lace pattern on each row before putting needles to yarn. It's currently stalled because I need to chart out the bust increases and haven't done that yet.

Does anyone else do it this way? Why is it that sweaters aren't routinely charted? Are people really able to do all that in their heads? If so, I am impressed.

Even though it's slowing down my progress, I really don't mind having to make the charts myself. Kind of feel like some kind of scientist, with my graph paper.

3.19.2010

Tea Leaves Cardigan

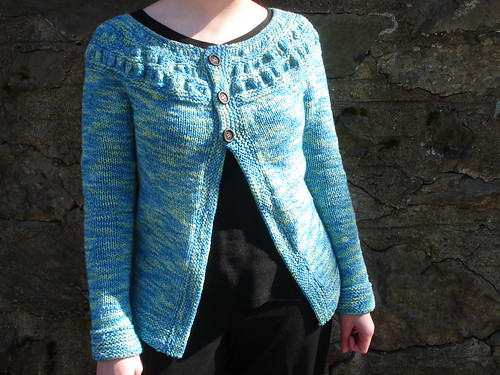
This, my people, is a finished Tea Leaves Cardigan:

2010 3-6 010

And here is the back:

2010 3-6 012

I'm very happy with it, although the going was rocky there for a while. And despite the fact that I finished it immediately before the weather broke and probably won't be able to wear it for a while.

There are a bunch of notes on my project page, so I don't want to repeat myself too much, but I would like to reaffirm how much I love Twisted. It is spongy and soft - not aggressively soft, just passively soft - and very warm. This sweater, despite not even closing down most of the front, actually makes me noticeably warmer. I suspect Twisted would make a lovely blanket yarn for this reason.

I frogged Wicked and meant to steam the skeined yarn to get some of the kinks out, but then I didn't get around to it before it was time to cast on. The resulting fabric was nubbly and wonky, which I hoped would come out in the blocking. I'd wet-blocked Wicked, so I'd been expecting the yarn not to bloom or expand as much the second time around. Well, the wet-blocking totally took care of the nubbliness, but it also made the whole thing much, much bigger. I could have dealt with it being a little bit bigger, but it was more like this-is-a-disaster bigger. So I laid out the sweater as neatly as I could, then came back around three or four more times in the first two hours of drying to try to scrunch it down to be shorter and narrower. That actually worked, pretty much. It didn't grow once it dried and I put it on.

2010 3-6 006

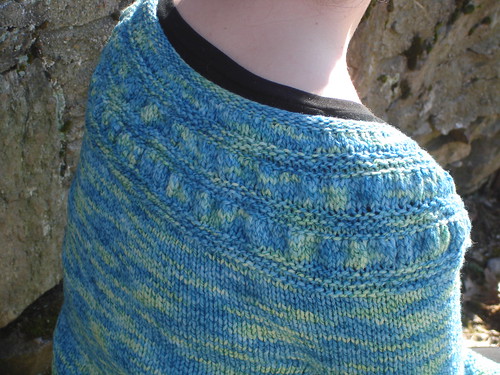
I did end up frogging back to the last ruffle and eliminating the last two (I think) sets of increases. Before blocking, this resulted in the ruffled yoke kind of sticking out strangely from the body. I thought about frogging back to the collar and doing all of the yoke increases more gradually, but then I decided to press on and hope it came out in the blocking, and it totally did.

Overall I'm really happy with the sweater. If I ever make it again, I'll definitely make and wet-block a gauge swatch, and then plan the yoke increases accordingly. I also knit a couple extra rows on the front button bands because I wanted them to be a bit wider, and I like how that came out. And I used three buttons instead of two, as I think the pattern calls for.

2.28.2010

Captain Jack says to look at the moon.

I am feeling queasy, and I was going over and over what I ate and wondering how it could be making me feel queasy, and then I realized that maybe I'm feeling queasy because I've spent about 9 (nine) hours today working stockinette stitch in the round. Blerg.

The good news is, my sleeves are really, really close to being done. The bad news is, closing ceremonies were a little bit ago, I still have button bands to do, I don't even have buttons yet, and the notion of working sixteen more rows of garter stitch in the round makes me... well let's just say it would probably be better not to think about it.

Motion sickness always, always sneaks up on me. I hate it.

So, we could talk about how my failure to finish the sweater before the closing ceremonies might have something to do with the fact that I started my planning about a day before the Winter Olympics started. That seems logical. Or it might have something to do with how insufficiently dedicated I was to this project, spending valuable knitting time on mittens (that also aren't finished, aarg). Or maybe the ridiculously lax approach I take to issues of gauge continues to seriously impede my forward progress. Or it might have to do with my vulnerability to distraction with shiny new projects.

We could talk about those things, or we could focus on some shiny new projects! Chagrined about my lack of planning for the Winter Olympics, which I had known were coming up for, oh, about three-odd years, I started planning well in advance for Malabrigo March.

Years ago, I went to my LYS in search of some nice red Malabrigo for a scarf. In desperation and not-so-great indoor light, I convinced myself that Geranio was red enough. Geranio is about the pinkest pinkest pink that any pony-owning, fairy princess nymph worth her salt could dream up:


but I got some and cast on for a one-row scarf anyway. The scarf was too wide, and the needles were too long, and it was all just so grotesquely pink that I put the project down and wandered off for three years.

So of course the middle of the Knitting Olympics is the perfect time to make one's first foray into Kool-Aid dyeing in preparation for Malabrigo March!


The What a Kool Way to Dye group on Ravelry has a ton of useful advice on Kool-Aid dyeing, so I read what they had to say, hunted down a bunch of packs of Black Cherry unsweetened soft drink mix, and went to town.


I used 9 packs of Kool-Aid for two skeins of worsted, and I now know that I should have used more. The rule of thumb seems to be one pack for every ounce of yarn for a nice color, but the more you use, the darker the color.

Husband came up with the brilliant idea of boiling a pot of water without any precious, feltable yarn in it, and then turning the gas down until it stopped boiling. My plan involved waiting until it boiled, freaking out, and then way overcompensating by turning it down way too far, then swinging back and forth between too hot and almost off over the course of several hours. His way ended up taking longer than the about-30 I was expecting based off of internet tutorials, but probably still short of an hour.

Probably the best thing about Kool-Aid dyeing is that you know exactly when it's done because the water turns clear, the dye having been all sucked up into the yarn.


Here it is in a nice, possibly deceptive, low light.


Still pink, but a pink I can live with. My original plan involved making the Daphne Hat and a Saroyan scarf -- in accordance with my new "Make Things That Actually Match" Initiative, but I'm not sure if there will be enough yarn. Maybe I'll start with the hat and then see what kind of scarf/cowly thing can be made out of whatever's left.

There is an end in sight with the sweater, and the mittens, and maybe not so much the socks, but I'll start new socks soon, too.