8.30.2015

Double There!

I finished some socks.  

I have very little recollection of knitting any of these, except for the one on the far right, which I knit in two days, over the course of 16 hours of training this week.  

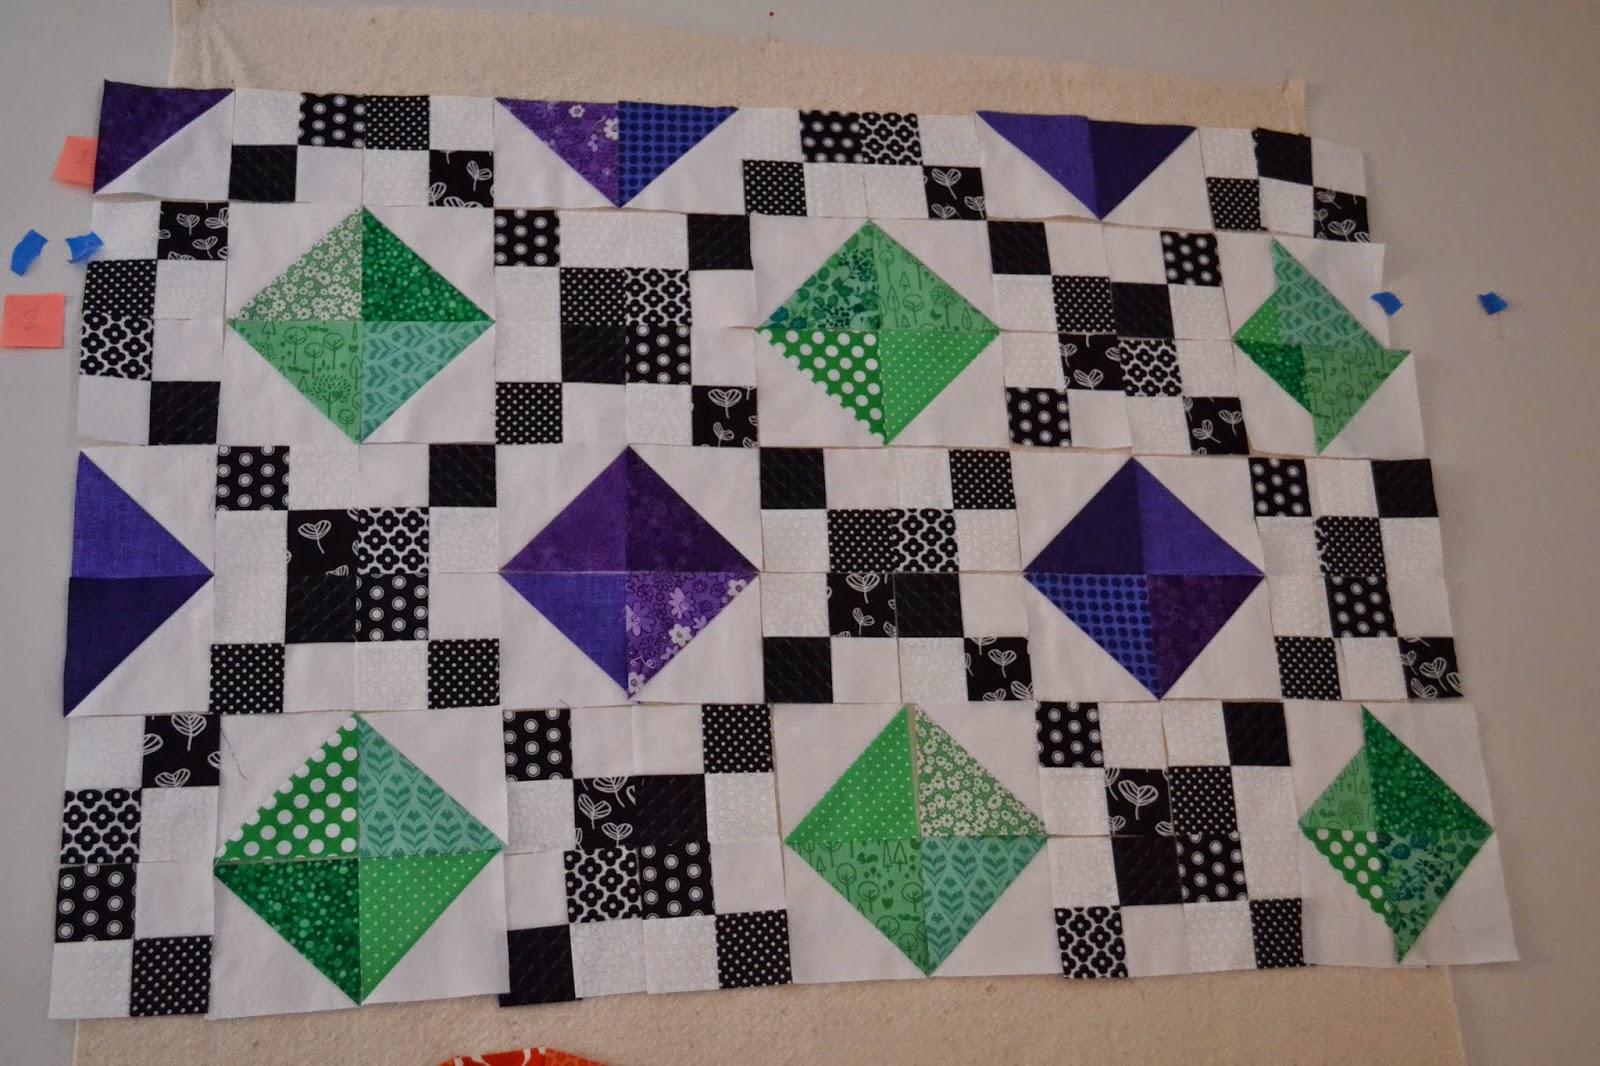
In other news, I finished this quilt, which I need a name for.  Maybe I'll just call it "THERE."  That sounds good.  I feel much the same way about finishing the quilt as I do finishing the top.  This took forever, time that I should have been spending on other stuff.  I just can't quit you, THERE Quilt. 


It's in the wash right now, in fact I should go move it to the dryer before the red parts bleed onto other fabrics.  BRB. 


Here's the back.  I used two half-yards of Connecting Threads fabric that I've had in my stash for a long time and that really only match each other.  I like them, but didn't really have a plan for them, and sewn together, they were just the right size for the back.  The label is done on the border fabric, which is a nice "low volume" (back in my day that was just called "light," get off my lawn) I got last year and didn't have any other plans for.   


 Designing this one was interesting, because I don't feel like I have a good design sense - when people talk about making choices for reasons, it strikes me that I have very little sense of direction with this.  So, I did whatever I felt like doing.  Is this a good design?  I dunno.  The gray parts were a huge PITA - it would have been much easier to just float everything in a sea of white.  The border - does it help?  Detract?  No idea.  It's just what I felt like doing.  My instinct was to do a dark gray for the binding, but I'm not sure how much of that I have left, and I went with a scrappy binding of mostly fabrics I hadn't managed to get into the squares for one reason or another. 


I did a squared-off stipple for the quilting, and I do feel that this nicely complements the boxy, right-angularity of the scrap squares.  It was difficult to do and definitely is not perfect.  I'd read a long time ago that it's helpful to kind of pause for a stitch or two before changing direction, and this definitely helped make the changes more square than curved.  


Explorer Bag

I finished attaching the nylon webbing to the explorer bag I started and then let sit for a long time.  


The front flap is a piece of light oranges I'd put together for the background of a scrappy quilt that ended up being too nondistinct from the other orange.  I freaking love it, and it was just the perfect size for this.  


Don't look too closely at the zipper.  


 Happy crafting! 


8.12.2015

THERE.


GAWD. 

7.03.2015

Pouch, Bag, Wall Thing

A pouch!

 Mom needed pouches for travel.  I gathered up some old knitted pouches and decided to employ some of the bitty piecing to make a nice shiny new quilted pouch to surprise her with.  

Hello, I am a pouch. 
The pouch has two sides!  This is one of them!
My process was: make a square-ish piece of fabric.  Make another one really close to the same size.  Quilt fabric and batting together.  Make pouch using normal pouch construction sewing fabric, zipper, and lining together and then lining-to-lining and outside-to-outside and then turning through a turning hole in the lining.  

Here is the other side of the pouch! 
Contrast zipper because that is the zipper I had in the right length.  Mailed it without taking any kind of measurements, though you can get a general idea from the happy accident that I photographed it sitting on top of a 9.5" square ruler. 


A bag!


On a family hike, I realized that kiddo needs a bag to collect rocks in, because one needs rocks to throw into streams and rivers and once you've visited a stream or river enough, there are few remaining rocks at hand.  So I consulted the fuzzy bag-ish thoughts in my head and drew up a template and started working.  This is the only picture I have of it so far, and I'm stalled trying to figure out if I'm going to make a strap out of quilted gray material or go with some nylon webbing.  I don't have any nylon webbing, at least none that isn't being used by another bag at the moment, so the bag sits while I think.  

Oh yeah, I put in my first slit pocket zipper and whoo, that did not go well!  It's a hot mess, but I don't have a zipper foot and it's on the back and it's for a three-year-old, so we're going with it.  
 

A Wall Thing!

I have needed a wall bill/mail holder/organizer thing for a long time. It finally occurred to me that I can make one.  Oh yeah, I make stuff!  Googled for a tutorial, voila, I've heard of noodlehead, she has a tutorial, I have slightly fewer than half of the called-for materials, let's go!  

To be specific, I have a canvas (the wrong size, my Wall Thing will be one-pocket) and fabric.  Oh, and interfacing, although I feel like a stranger in a strange land when it comes to interfacing, never sure which interfacing is the right interfacing, not sure exactly how to use it, and pretty sure I'm going to ruin my iron and possibly my life if I do it wrong. 

My long-thwarted desire for a Wall Thing will outweigh my long-held distrust of interfacing, though, and I plan to learn things and hopefully not cry too many times and maybe find a stapler, the nice kind that swings open and actually holds stuff together, so that this whole project isn't dependent on Mod Podge.  We'll see.  

Happy crafting! 

5.23.2015

After Hours

After finishing Weathervane Island, I was ready for more of that sweet, sweet finish-y feeling, but without the commitment of several months of work.  I'd recently turned up a little quilt from when I was a kid (below, left), which gave me an idea for a shortcut to the payoff. 


The old little quilt is a true mess - some seams are hand-stitched and some are machine-stitched, there isn't a right angle or straight line to be found, and it's clearly seen a lot of love.  An evening's work produced the little quilt on the right from my purple scraps.  I pieced and log-cabined and cut and pieced some more, then sandwiched it with some flannel and a plain back and did envelope construction.  Machine-stitched the turning hole closed and top-stitched around the outside edge, no burying threads or hand sewing at all, and it felt great.  

Other remarked that Martin Scorsese would always shoot a little project after spending years on a movie - well, I get the impulse.  

I felt like I should get back to my next big project, which right now is all about varying shades of gray with some white thrown in, and lo, needed a leader and ender project to work on with all the piecing of the little tiny quilt.  I blew through all the gray stuff I had ready to piece and felt very proud that I'd gotten back into the big project.  

Aaand then, this happened:


And, then pillows: 


Churning out cute little mini things seems to be out of my system for now, and I've just finished a dozen gray Ohio Stars, which is good, but something about piecing together these teeny little scraps is very satisfying - there are probably more tiny little dollhouse quilts in my future. 

Linking up with Finish It Up Friday at crazymomquilts.  Happy crafting!

5.15.2015

BQF: Love Grows a Grove

My second entry for the Blogger's Quilt Festival is Love Grows a Grove, a twin-sized orange tumbler quilt. 

With five lines of quilting at every seam, the process took awhile.  Dealing with the very lofty wool batting and so many quilting intersections was frustrating and there is a whopping number of imperfections in it, but once it went onto the bed, I stopped seeing them entirely.  Now I just see the Orange Quilt, as it is known around the house.  


Spot Check in orange and some mini tumblers make up the back.  There's no plain white on the front, but some of the mini tumblers are white. 


Bias binding in Navy Kona, because as stubbornly orange as this is, I couldn't stubborn any more orange. 


I collected orange fabrics from far and wide for this one - old stash, a couple online purchases, plus things from quilt shops nearly a thousand miles apart.  I like to think that it would be almost impossible to replicate it.  How many of our quilts wouldn't that be true for, though?  

Quilt Stats:

Pattern: Tumbler (made from my own 6" template)
Dimensions: 62"x83.5"
Thread: 100% poly C&C in white
Yay!: ORANGE
Doh: Puckers, puckers at the crosses
Binding: Double fold bias binding in Kona Navy, machine sewn to the front and hand sewn to the back

This quilt is in the Machine Quilted at Home category of the Blogger's Quilt Festival.  Happy crafting!

BQF: Weathervane Island

The Weathervane quilt is finished! 

I used the weathervane block variation that Patch the Giraffe used for this beauty with a different design for the sashing.  
Before its wash
Hand-quilted about 1/4" away from the colored fabric in each block, and 1/4" outside the cornerstone squares.  In the picture below, you can see a bit of the purple-on-white print I used instead of white on the inside of two of the squares. 


Green and purple may be my favorite color combination.  The green fabrics are a combination of stash and much hunted-for shades of the exact right green, which for me means true green leaning toward teal. 


After its wash


The back was pieced from fabric that's not my favorite, or that I have a whole lot of and bought just for backings. 


The back, featuring not-the-best green

The binding used up most of the rest of my Fizz in the medium green hue - I'm sad to see it go, but I love the shade of it and thought it was worth it to use on the binding, since it is pretty visible. 


This one will hang in the very bare bedroom.  


Quilt Stats:

Pattern: Weathervane variation
Dimensions: 39"x39"
Thread: pieced in C&C white 100% poly, quilted in crazy strong old handquilting thread in white
Batting: Natural 100% Cotton Hobbs Heirloom
Yay: Favorite colors! and Secondary pattern in cornerstones
Doh: I'd change some of the value pairings of color if I were starting over again
Binding: Double Fold, machine sewn to front, hand sewn to back

Linking to the Blogger's Quilt Festival and Crazy Mom Quilts Finish it Up Friday.

Happy Crafting! 

5.12.2015

Greetings from Sleeve Island

In knitting, when you're working on the sleeves of the sweater, and you work and work and work and have basically nothing to tell the blog about other than "sleeves more again," that is called being stuck on Sleeve Island.  Maybe only by the Yarn Harlot. 

I haven't come up with a good name for the same phenomenon in quilting, in which hand quilting something takes a while... and then longer... and then, like, a lot freaking longer because it takes so long.  Hand Quilting Isthmus?  That doesn't have the same ring.


Anyway, that's where I've been.  Then, after my long stay on Quilting Sleeve Island, I got stuck at Hand Sewing Binding Down Customs.  I estimated that doing all of the hand quilting was going to take 16 evenings, and I wish I could remember when I thought that, but I'm quite sure it was more than 16 days ago. 

I just finished it, just now, and took a way-after-dark picture of it.  I'll write up the post on Friday, so as to enter it into the Blogger's Quilt Festival.  At first I thought that started 5/1 and was bummed that I'd missed it with this quilt, but of course I was wrong and it starts Friday.

Hopefully sunlight will be kinder to it.  I'll wash it, too, which should shrink the batting a bit.

SELF.  GO TO BED.  Okay.  Goodnight, and happy crafting! 

4.25.2015

Bloggy blog

Working on the Weathervane.


Decided to hand quilt it because I hate finishing stuff. 

Fussy cut tree in the center
The back is pieced from a half-yard that I liked a lot better online than in person (top), a FQ from a bundle that I can't stand the color of (middle), and some of the Connecting Threads yardage that I backed the Rainy Quilt with. 


It would be helpful to not have seams to deal with on the back for hand quilting, but I'm glad to use up stash that I don't really like.  The colors look nice together, it's just not to my taste. 

I've also started a quilt for my brother that is my design, and that I'm really excited about.  Once there's something more to look at, I'll post some pictures - right now it's just bits of white and gray fabric. 

Happy crafting!

4.03.2015

FO: Hexagon Tetris Land

When I was on maternity leave, I spent a lot of time looking at quilting blogs and collecting tutorials to return to someday.  There are probably enough to keep me busy for years.  When I'm thinking about new quilts, I go through the list, and on the last pass-through, this one caught my eye.  It's from the Festival of Hexagons, a tutorial from acraftyfox. 


By far my favorite part is the label - this little hexagon didn't make the cut for the front, because there wasn't enough contrast between the hexagon and the neutrals - it just looked like a random vine.   But there was just enough room for writing, and I think it's adorable. 


The back is a batik-y thing that I've had for ages.  It has a nice hand and is thick and sturdy, but I confess that I find it terribly ugly.  This used up nearly all of it - go, austerity!  This will be a wallhanging, so I don't expect it to see the light of day much.  


To quilt it, I wanted to have undulating sort of waves that sort of echoed but got distorted along the way.  It didn't come out exactly as I wanted it to, but it's pretty close.  I got my FMQ foot out for the first time in a long time just recently, and was surprised at how much I enjoyed the process of FMQing this, even if I'm out of practice.  


Tomorrow I'll wash it and get it hung up. 

Quilt Facts:

Title: Hexagon Tetris Land
Batting: 100% cotton Hobbs, either organic or not (can't remember which scraps I pulled from)
Thread: C&C 100% polyester, white
Backing: ancient stash batik
Yay!: scrappy neutrals
Doh: herky jerky starts and stops in FMQ
Number of Meta-Hexagon fabric included: 3

Yay, Finish It Up Friday is back!  Linky linky. 

Happy crafting! 

3.26.2015

March WIPs

The Carmarthen mittens are done, and they're very pretty, and they're huge. 


 My beloved owl mittens have sprung a leak right in the middle of the pad of the right thumb, so when it was 3 degrees Fahrenheit (that's right) one morning this week, I went ahead and wore the Carmarthen.  They are indeed too big to be practical, which is disappointing.  They might be just the right size for a gift for someone, but I'm not sure yet. 

The Weathervane Quilt is coming along.  As I worked on the blocks, I was convinced that this was going to be the single most beautiful thing I've ever made, but then I got them up onto the design wall and am not as psyched. 


Value strikes again, I guess.  I did some B&W pictures to try to distribute the values better, and sitting here looking at this picture makes me want to make a few more changes before I keep sewing.  Next up is some sashing with cornerstones.  

Finally, there's this weird thing.  


This is based on the hexachevragon tutorial at acraftyfox.net with an asymmetrical border that I'm adding.  I can't decide if the border says, "Interesting attempt to add motion to the design and achieve balance with asymmetry" or "My hexagon ruler can make a bunch of different sizes!"  I've dug deep to not repeat any orange fabrics in the big hexagons, piecing several pieces together from scraps from the orange tumbler quilt, and I'm really enjoying the scrappiness of the neutrals.  

Just have the top border to finish on this one, then it can be basted and quilted.  The design wall here is the batting that will be used in the quilt, and there is a batik-ish reddish orangish bit of fabric I've had forever that is just the right size for the back.  

Happy crafting!

3.11.2015

FO: Get Along, Green

Well, it's all over but the sawing. 


Of the dowel rod, that is.  


Think I could've done better with the color placement, especially in the blue-to-green range - I let my shapes dictate where each piece went and it ended up not being a terribly smooth color transition.  The green to yellow is dire, but I don't like the colors in that range very much, so it's not surprising there weren't many scraps there. 

Bound the quilt in Kona Jade left over from the Mail-Order Gorilla - squeaked by with just enough, which was nice. 


This was the fastest hanging sleeve ever.  Thank goodness for fugly why-do-I-own-this fabrics - there's no sense in spending $9/yard for a hanging sleeve.  This one was the perfect size selvage to selvage, so I left them on (no folding and sewing down) and didn't sew the sleeve to itself, just stuck it in place as I sewed the binding to the front so it caught on the back.  

I've seen tutorials that call for basting the hanging sleeve about as much as you will need ease for the dowel to go through, but whenever I can avoid basting I do.  My trick is to put the dowel in, pin it into place so that the fabric lies flat against the back of the quilt, and then sew it down binding-style. 

Quilt shows would probably not be impressed, but that's okay.  Have not yet decided where this one will live - it may go with me to my office, or it may spruce up my very bare bedroom.  

Quilt Facts:

Finished Size: 19.25"x43"
Batting: Yes, definitely batting
Thread: White mystery thread, some cotton/cotton, others probably not

And now I will give in to the urge to go through my scrap bin and cut a bunch of white and close-to-white scraps into 2.25"x4.5" strips.  That seems like the kind of urge one would regret jumping on. 

Happy crafting!

3.03.2015

Yay for Slidey Ramp

I've written 74% of three different blog posts in my head, and have 11 minutes in which to get it all down, and it doesn't seem like it's going to go well.  Off we go! 

First:


I finished the blanket!  It's snuggly warm, we're still living in a frozen hellscape, and yay.  Decided to do the garter edge when it seemed like I'd have plenty of yarn left over then had about 8" of yarn left over.  Close enough! 

Second: 

Now starts Austerity.  On this wallhanging, I used up a lot of the cotton-covered cotton/mystery white bobbins that are proving unfit for bed quilts that get pulled on a lot.  (By which I mean every night I listen to my quilting on the Mail Order Gorilla quilt popping and gnash my teeth.) 


I pieced the back from several neutral remnants. 


Third: 

Sometimes I wish that Finish it Up Friday were Stick a Fork in it Sunday.  I finished the gradient quilt on Sunday and then didn't want to post about it until Friday, so then I got confused and wandered around and then finished this cowl, of which I had knit all but the bindoff about four years ago:  


It's so pretty, and warm, and I'm not sure why I left that sitting for so long.  

Fourth: 

In working on the green/purple/black jewel box quilt, I discovered that I hadn't made enough purple hsts or b/w 4-patches, now that you mention it, and the idea of making more of those blocks was unappealing.  So I designed three more quilts and then cut the fabric I'd been avoiding, plus fabric for a coordinating wallhanging.  

Fifth: 

Weathervane.  I've worked on this all day - it's Random Day Off Day, and I've squeezed every drop of quilting time out of it.  Couldn't go on.  


Paper plate system shamelessly stolen from Tales of Ineptitude.  Those three little scraps of white in the middle are what remain of my big stash of plain white fabric, soooo.  Austerity's going to be hard.  I've got a bit to spend with which to stock up on stuff, but then it'll be nothing except birthday/Christmas generosity.  

Happy crafting!

2.21.2015

Doh

In hopes of finishing the baby's blanket for her birthday, I worked on it for several evenings.  Took it to work and got a lot done on it during a rare hour-and-a-half phone call, then forgot it as I ran out of the office for the evening two nights in a row.  It occurred to me to be worried that I may not finish it before winter ends, but at the rate we're going, there will be plenty of frozen hellscape left in which to enjoy a snuggly new blanket.  Meanwhile, she's turning one and has no concept of a birthday or birthday gift, so it'll get finished soon and I'll give it to her when it's done and that will be fine.  

The purple and green quilt is coming along - three blocks are together and more are laid out. 


I'm working hard to accept that this quilt will be a slow plod - I'm working really hard to match up points and edges, and the third block looks better than the first.  Once I finished the first block, I considered making it bigger by a block in each direction, and then I considered the work it would take to do that and gave right up.  When I realized how slowly this one was going, I went with a whim and started a new quilt. 


And then when I forgot the baby blanket, I spent an evening piecing the back from light-colored remnants, and then I forgot it again and this happened:


This involved lots of spray baste, which you're supposed to use in a well-ventilated space.  I'm pretty sure a cozy little house in the dead of the aforementioned frozen hellscape totally counts.  

I plan to quilt it with close parallel lines running horizontally - not close enough to be matchstick, but maybe 1/4".  After I finish knitting the blanket.  Yeah.  

Happy crafting!

2.13.2015

Finish: A Little Pretty

My office does a Secret Admirer swap in February instead of a Secret Santa at Christmas, and the person whose name I drew once said she hoped I'd knit her something someday.  With only a week to get it done, I wasn't sure I could finish a handknit project, so I made a little pincushion/office ornament for her using this tutorial. 


If I'd had more time, I probably would've made a fabric-covered button to match the dark pink background fabric, but was lucky to find a suitable bead/button thingy for the middle in my bead stash. 

I'm making two again, and was happy about how much my folding improved from the first to the second.  


Though I'd intended to put the teal and yellow-green across from each other, I luckily messed it up on the one that wasn't folded as well. 


Bwaaww, little tiny blanket-stitched label!  It's really there to distract from the Frankensteinian whip-stitched turning hole.  Not even invisible thread can help that one, so distraction seemed to be the best way to handle it.  Usually, doing the one I'm keeping first allows me to get all the stupid mistakes out of the way and it's nice to just have a practice run so the second one can be a little better.  Because I didn't have much time left, though, I had to finish this one first, so it could be a bit more polished than it turned out. 


I stuffed this with fabric scraps - piles of thread ends and threads clipped from the edges of fabric after prewashing make the best stuffing.  Leftover wool is really great too, springy and squishy. 


I feel like I'm putting myself out there a bit with this one.  I'm sure the recipient will appear to like it, because my coworkers are almost uniformly lovely, gracious beings, but I hope that she hangs it on her wall and it gives her a little bit of joy to look at every day.  

Linking to Finish it Up Friday at crazymomquilts.  

Happy crafting!

2.02.2015

When in doubt, knit.

My favorite part of the whole quilting process, I think, is when it's time to start the laying out of actual fabrics.  


I sewed eight segments together, sewing the wrong edges together on one and then running out of bobbin thread and not noticing on the last three.  Then I swore a lot, fixed it, and walked away for a bit, partly because quilting is supposed to improve my day, not make it worse, and also because the little one is going through a transition right now and it is a loud and time-consuming process, and incompatible with seam matching and correctly orienting anything.  (And sleeping, and thinking straight.) 


(Re-)Enter the baby dots/dot pattern blanket that I started oh, back before she was born.  It is a gigantic pain in the ass to knit, but I like the effect and it's giving me something to focus on.  Kiddo, I can't make you stop crying, but I can knit you this blanket.  

Happy crafting!